Purchase Orders
Purchase Orders can be used to order stock from external suppliers.
Preferences🔗
Use Purchase Orders🔗
In order to use purchase orders you need to have the Use procurement functionality store preference enabled for your store.

Authorise Purchase Orders🔗
Authorisation is required if the Global preference Authorise Purchase Orders is enabled.
When enabled, the next purchase order status after New is Ready for Approval. Only an user with authorisation permissions can confirm proceeding to the next status, Ready for Sending.
Permissions🔗
Authorise Purchase Orders🔗
Any users who should be able to authorise purchase orders should have the user permission Authorise purchase orders enabled.
Having this permission enabled will allow the user to proceed the purchase order status from Ready for Approval to Ready for Sending if authorisation is required.
It also allows the user to edit the Adjusted packs value after the purchase order is at Ready for Sending status or further. Users without permission are unable to edit this field.
Viewing Purchase Orders🔗
Go to the Purchase Orders Menu🔗
With the Use procurement functionality store preference on, you will be able to access the Purchase Order menu:
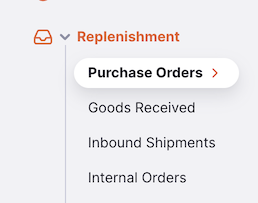
- Go to the
Replenishmentmenu in the navigation panel - Click on
Purchase Orders
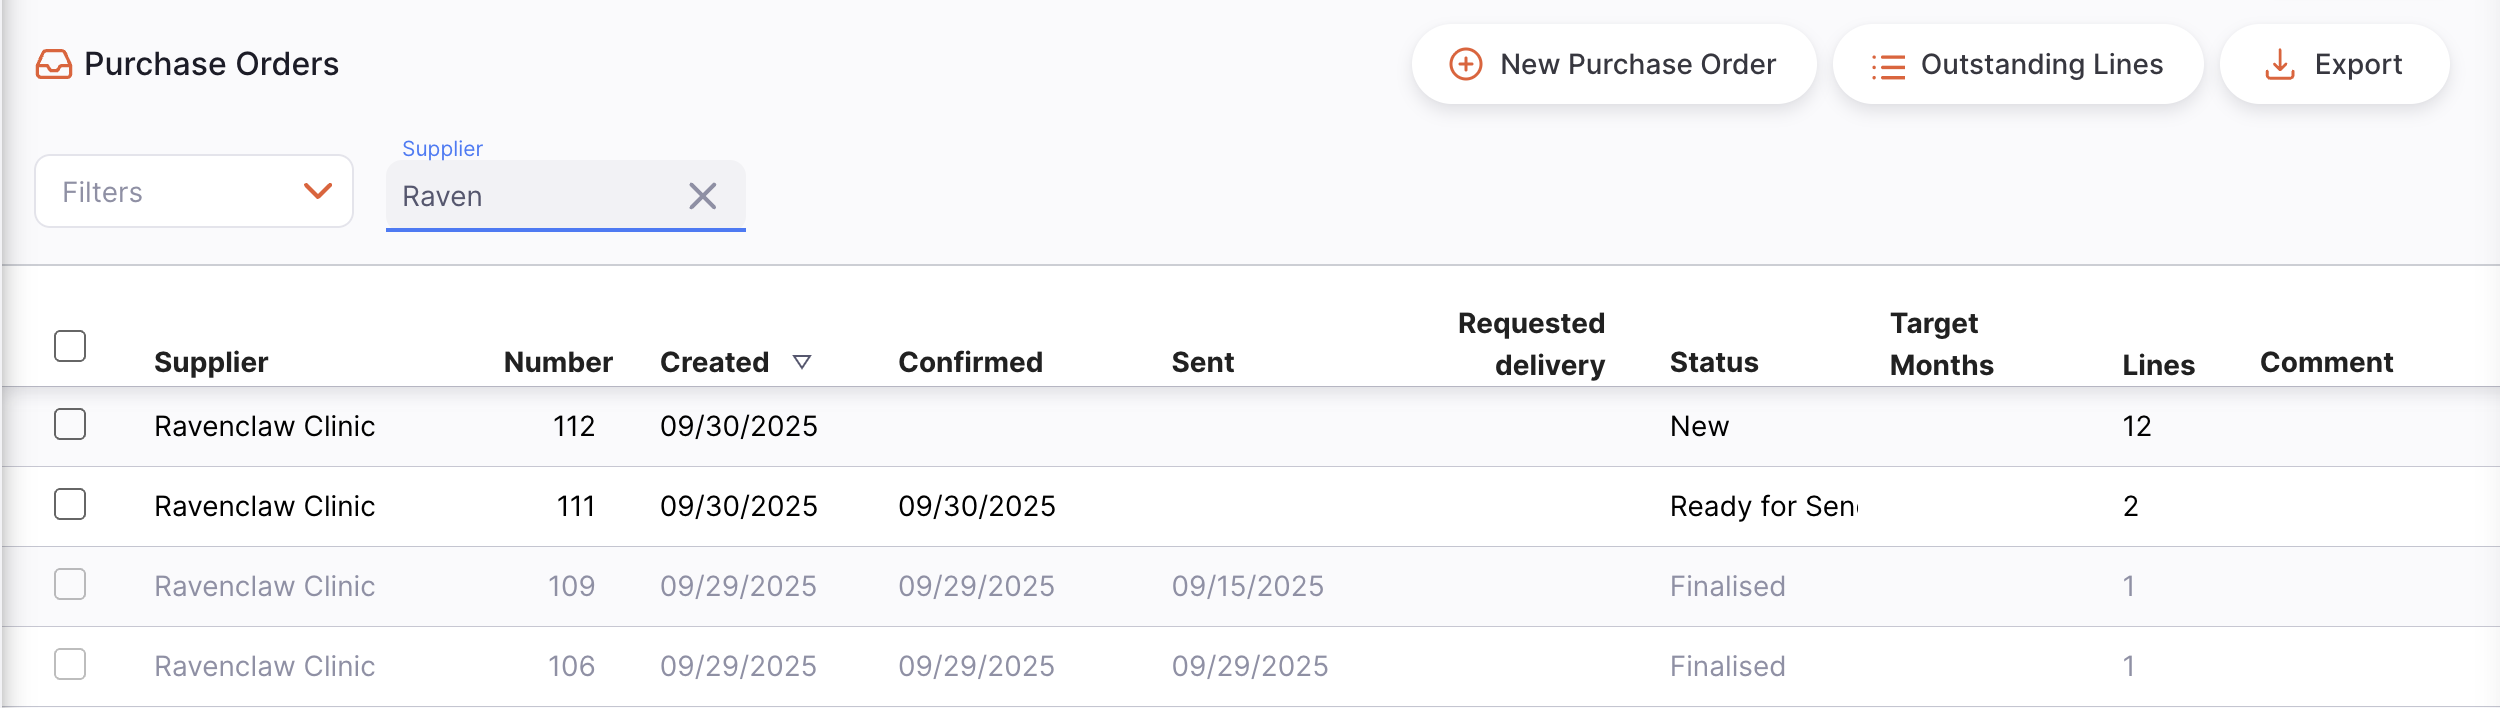
Purchase Orders list🔗
The first thing you see is a list of existing Purchase Orders.
The Purchase Orders list is divided into the following columns:
| Column | Description |
|---|---|
| Supplier | Name of the Supplier |
| Number | Purchase Order Number |
| Created | Created date |
| Confirmed | Confirmed date |
| Sent | Sent date |
| Requested delivery | Requested delivery date |
| Status | Current status |
| Target Months | Target months supply |
| Lines | Number of lines on the purchase order |
| Comment | Purchase order comment |
Filter Purchase Orders🔗
You can filter the list of purchase orders by supplier, status, confirmed date, requested delivery date, and sent date. This can be useful if you're looking for one particular order!
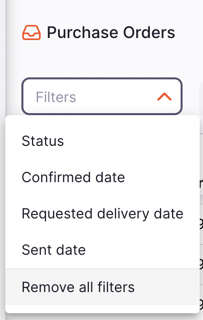
For example, to filter by supplier name, click on Filters, select Supplier and start typing some or all of a supplier name in the Supplier field. All the purchase orders for this supplier will appear in the list.
Exporting Purchase Orders🔗
The list of Purchase Orders can be exported to a comma separated file (csv). Simply click the export button (on the right, at the top of the page) and the file will be downloaded.
The export function will download all Purchase Orders, not just the current page, if you have more than 20 of them.
Delete a Purchase Order🔗
You can delete an order from the Purchase Order list.
-
Select the purchase order that you want to delete by checking the box on the left end of the list. You can select more than one purchase order to be deleted. You can even select them all using the master checkbox in the list headers.
-
The
Actionsfooter will display at the bottom of the screen when a purchase order is selected. It will display the number of purchase orders selected and the actions which can be taken. ClickDelete.
A notification confirms how many purchase orders were deleted (bottom left corner).
New.
Outstanding Purchase Order Lines🔗
To see the lines currently outstanding on purchase orders, tap on the Outstanding lines button.
This will take you to a list of lines currently outstanding. These are lines that have been sent to the supplier, but are yet to be received or are partially received.
Outstanding Purchase Order Lines Columns🔗
| Column | Description |
|---|---|
| PO Number | Purchase Order Number |
| PO reference | Supplier reference |
| Created by | User who created the purchase order |
| Supplier code | Code for the supplier |
| Supplier name | Name for the supplier |
| Item name | Name of the outstanding item |
| PO Confirmed | Confirmed date |
| Expected delivery date | Expected delivery date |
| Adjusted units (expected) | Quantity of units ordered in this purchase order |
| Received units | Quantity of units received to this purchase order |
| Outstanding units | Outstanding number of units in this purchase order |
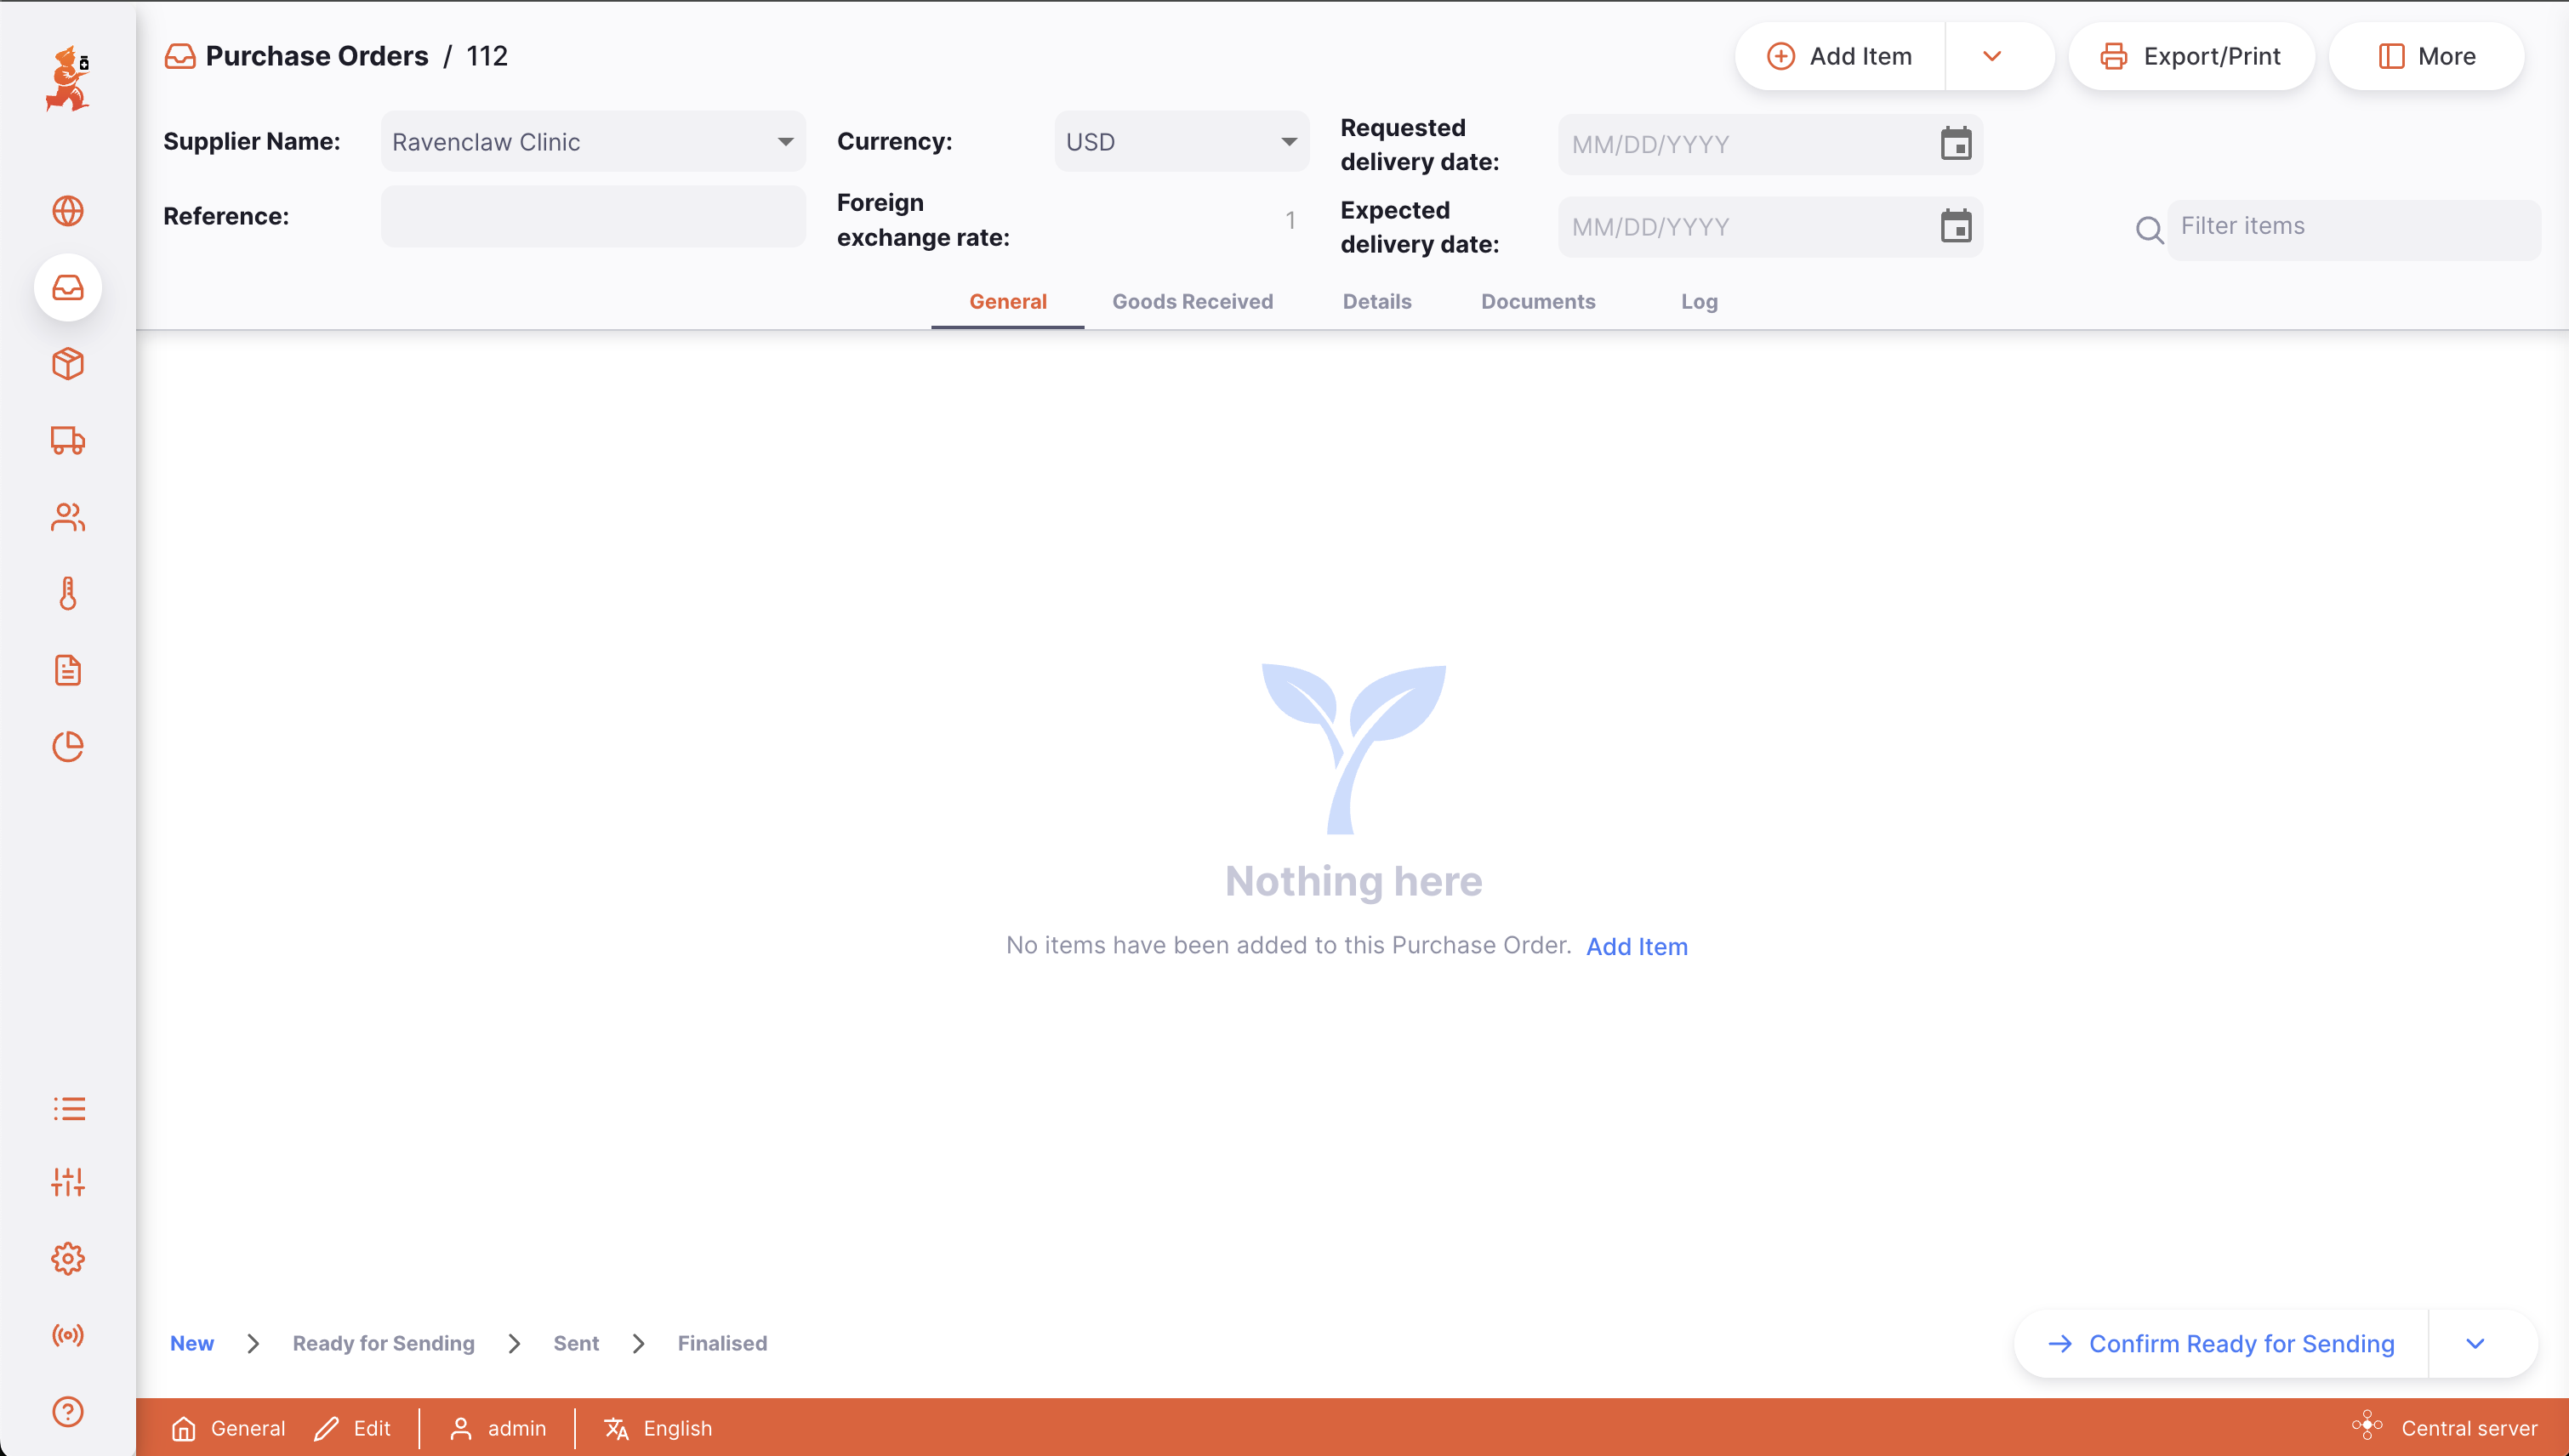
Creating a new Purchase Order🔗
- Go to
Replenishment>Purchase Orders - Press the
New Purchase Orderbutton, in the top right corner - A new window
Suppliersopens, inviting you to select a supplier - When a supplier is selected, the purchase order is created
Select a Supplier🔗
- In the
Supplierswindow, you will be presented with a list of suppliers. You can select your supplier from the list or you can begin typing the name of a supplier to filter the list.

- Once you have selected a supplier, your Purchase Order is created.
New.
Edit the Supplier Name🔗
If you have selected the wrong supplier, you can change the supplier name in the Supplier Name field or select one the dropdown list:
Enter a Supplier Reference🔗
Once your Purchase Order has been created, you can capture a supplier reference in the Supplier Ref field, if they have one (eg. PO#1234567)
Enter a requested delivery date🔗
Enter the requested delivery date for the purchase order. If any item(s) needs a different date, this can be added when creating or editing the item.
Enter an expected delivery date🔗
Enter the expected delivery date for the purchase order, provided by the supplier. If any item(s) needs a different date, this can be added when creating or editing the item.
Foreign currencies🔗
You can select a foreign currency for the purchase order. This will usually be in your suppliers currency. Click on the dropdown menu and select the currency that you would like to use for the purchase order.
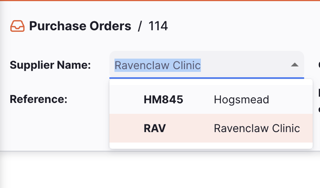
View or edit the Purchase Order Information Panel🔗
The Information Panel allows you see or to edit information about the Purchase Order. It is divided in multiple sections:
- Pricing
- Other
- Dates
How to open and close the Information Panel ?🔗
To open the Information Panel, you can tap on the More button, located in the top right corner of the Purchase Order view.
You can close by tapping on the X Close button, on the top right corner of the information panel.
Pricing🔗
In the Pricing section, you can see pricing information for the Purchase Order.
This includes:
- Subtotal
- Additional fees (entered in the Details tab)
- Supplier discount percentage
- Supplier discount amount
- Final cost
Other🔗
In the Other section, you can:
- Donor name
- Select a shipping method (if you have this configured in mSupply)
- Write or edit a comment
Dates🔗
In this section, you will see key dates for the Purchase Order.
- Confirmed
- Sent
- Contract signed
- Advance paid
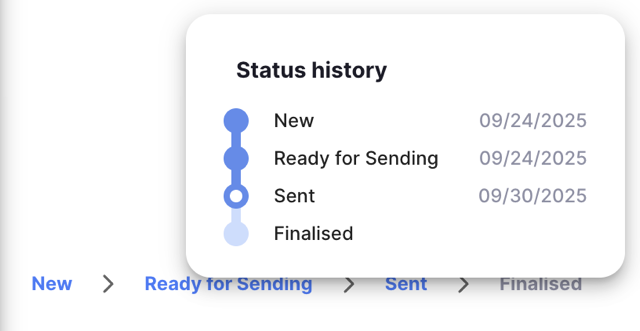
Purchase Order Status Sequence🔗
The status sequence is located at the bottom left corner of the Purchase Order screen.
Passed statuses are highlighted in blue, next statuses appear in grey.

Sent.There are 5 statuses for the Purchase Orders (although you might see a smaller number, if Authorisation is not required):
| Status | Description | mSupply | Lines editable | Lines editable for authorised users |
|---|---|---|---|---|
| New | This is the first status when you create a new Purchase Order | nw | ✓ | ✓ |
| Ready for Approval | The order is ready to be approved by someone with authorisation (applies only if the Requires Authorisation preference is on) | sg | ✓ | ✓ |
| Ready for Sending | The purchase order is ready to send to the supplier | cn | ✓ | |
| Sent | The purchase order has been sent to the supplier. Purchase order lines will be updated to the Sent status | cn | ✓ | |
| Finalised | When you confirm that the order has been received. Purchase order lines will be updated to the Closed status | fn |
The Ready for Approval status only applies if the Authorise Purchase Orders global preference is turned on. If the preference is off, purchase orders will progress from New status to Ready for Sending.
You'll see that the status bar has only the status values which apply depending on Authorisation preferences.

Ready for sending.If you hover over the status sequence, an order history window appears. You can see the date when a purchase order was updated from one status to another.
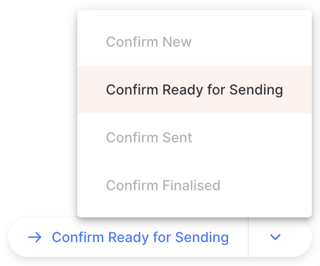
Confirm button🔗
The Confirm button is the button to update the status of a purchase order. The status which you can confirm depends on the current status of the purchase order and follows the sequence shown below.
When managing a Purchase Order, you can only confirm the next status which is shown on the button. Statuses cannot be skipped.
| Confirm... | Current Status | Next Status (If Authorisation is on) | Next Status (If Authorisation is off) |
|---|---|---|---|
| New | New | Ready for Approval | Ready for Sending |
| Ready for Approval | Ready for Approval | Ready for Sending | N/A |
| Ready for Sending | Ready for Sending | Sent | Sent |
| Sent | Sent | Finalised | Finalised |
| Finalised | Finalised |
Purchase orders must proceed through the statuses in the exact order. The status can also go back to a previous step when certain actions are taken. The system will always show you the next available status on the button.
Clicking on the confirm button will show a prompt to proceed, which may have further information.
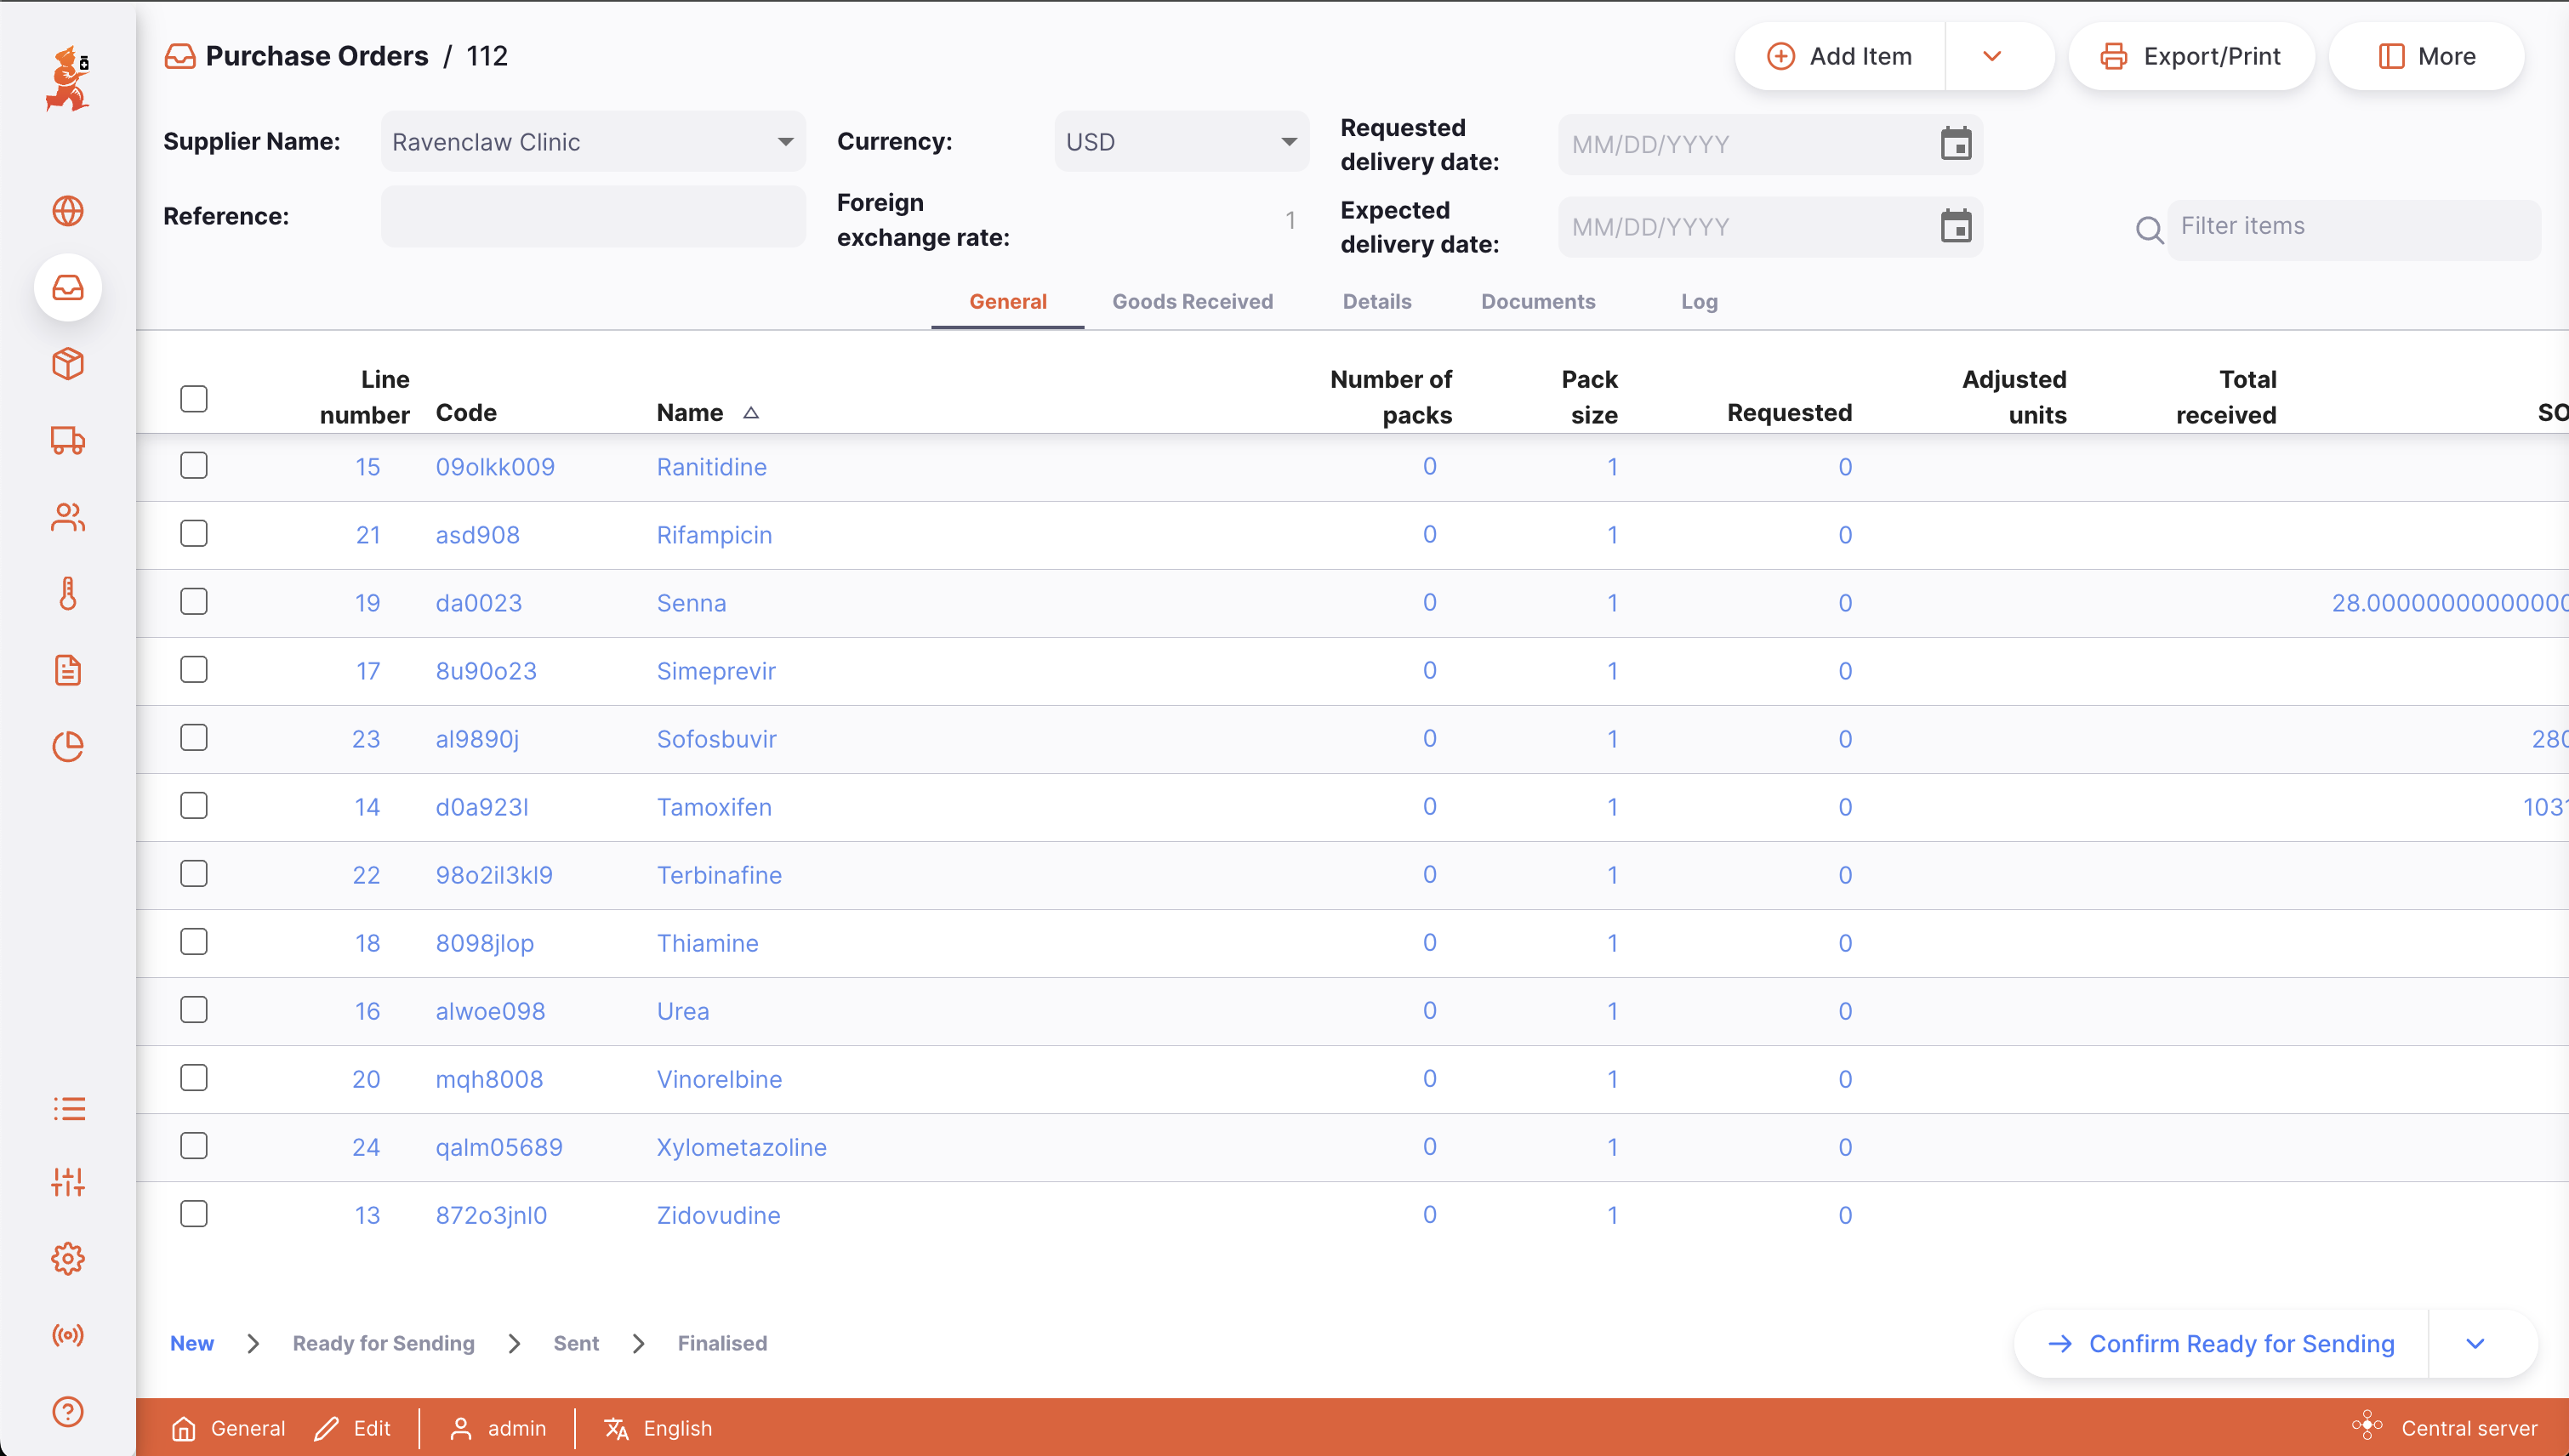
Adding lines to an Purchase Order🔗
To add a line, tap on the Add Item button located in the top left corner of your screen.
A new Add Item window opens.

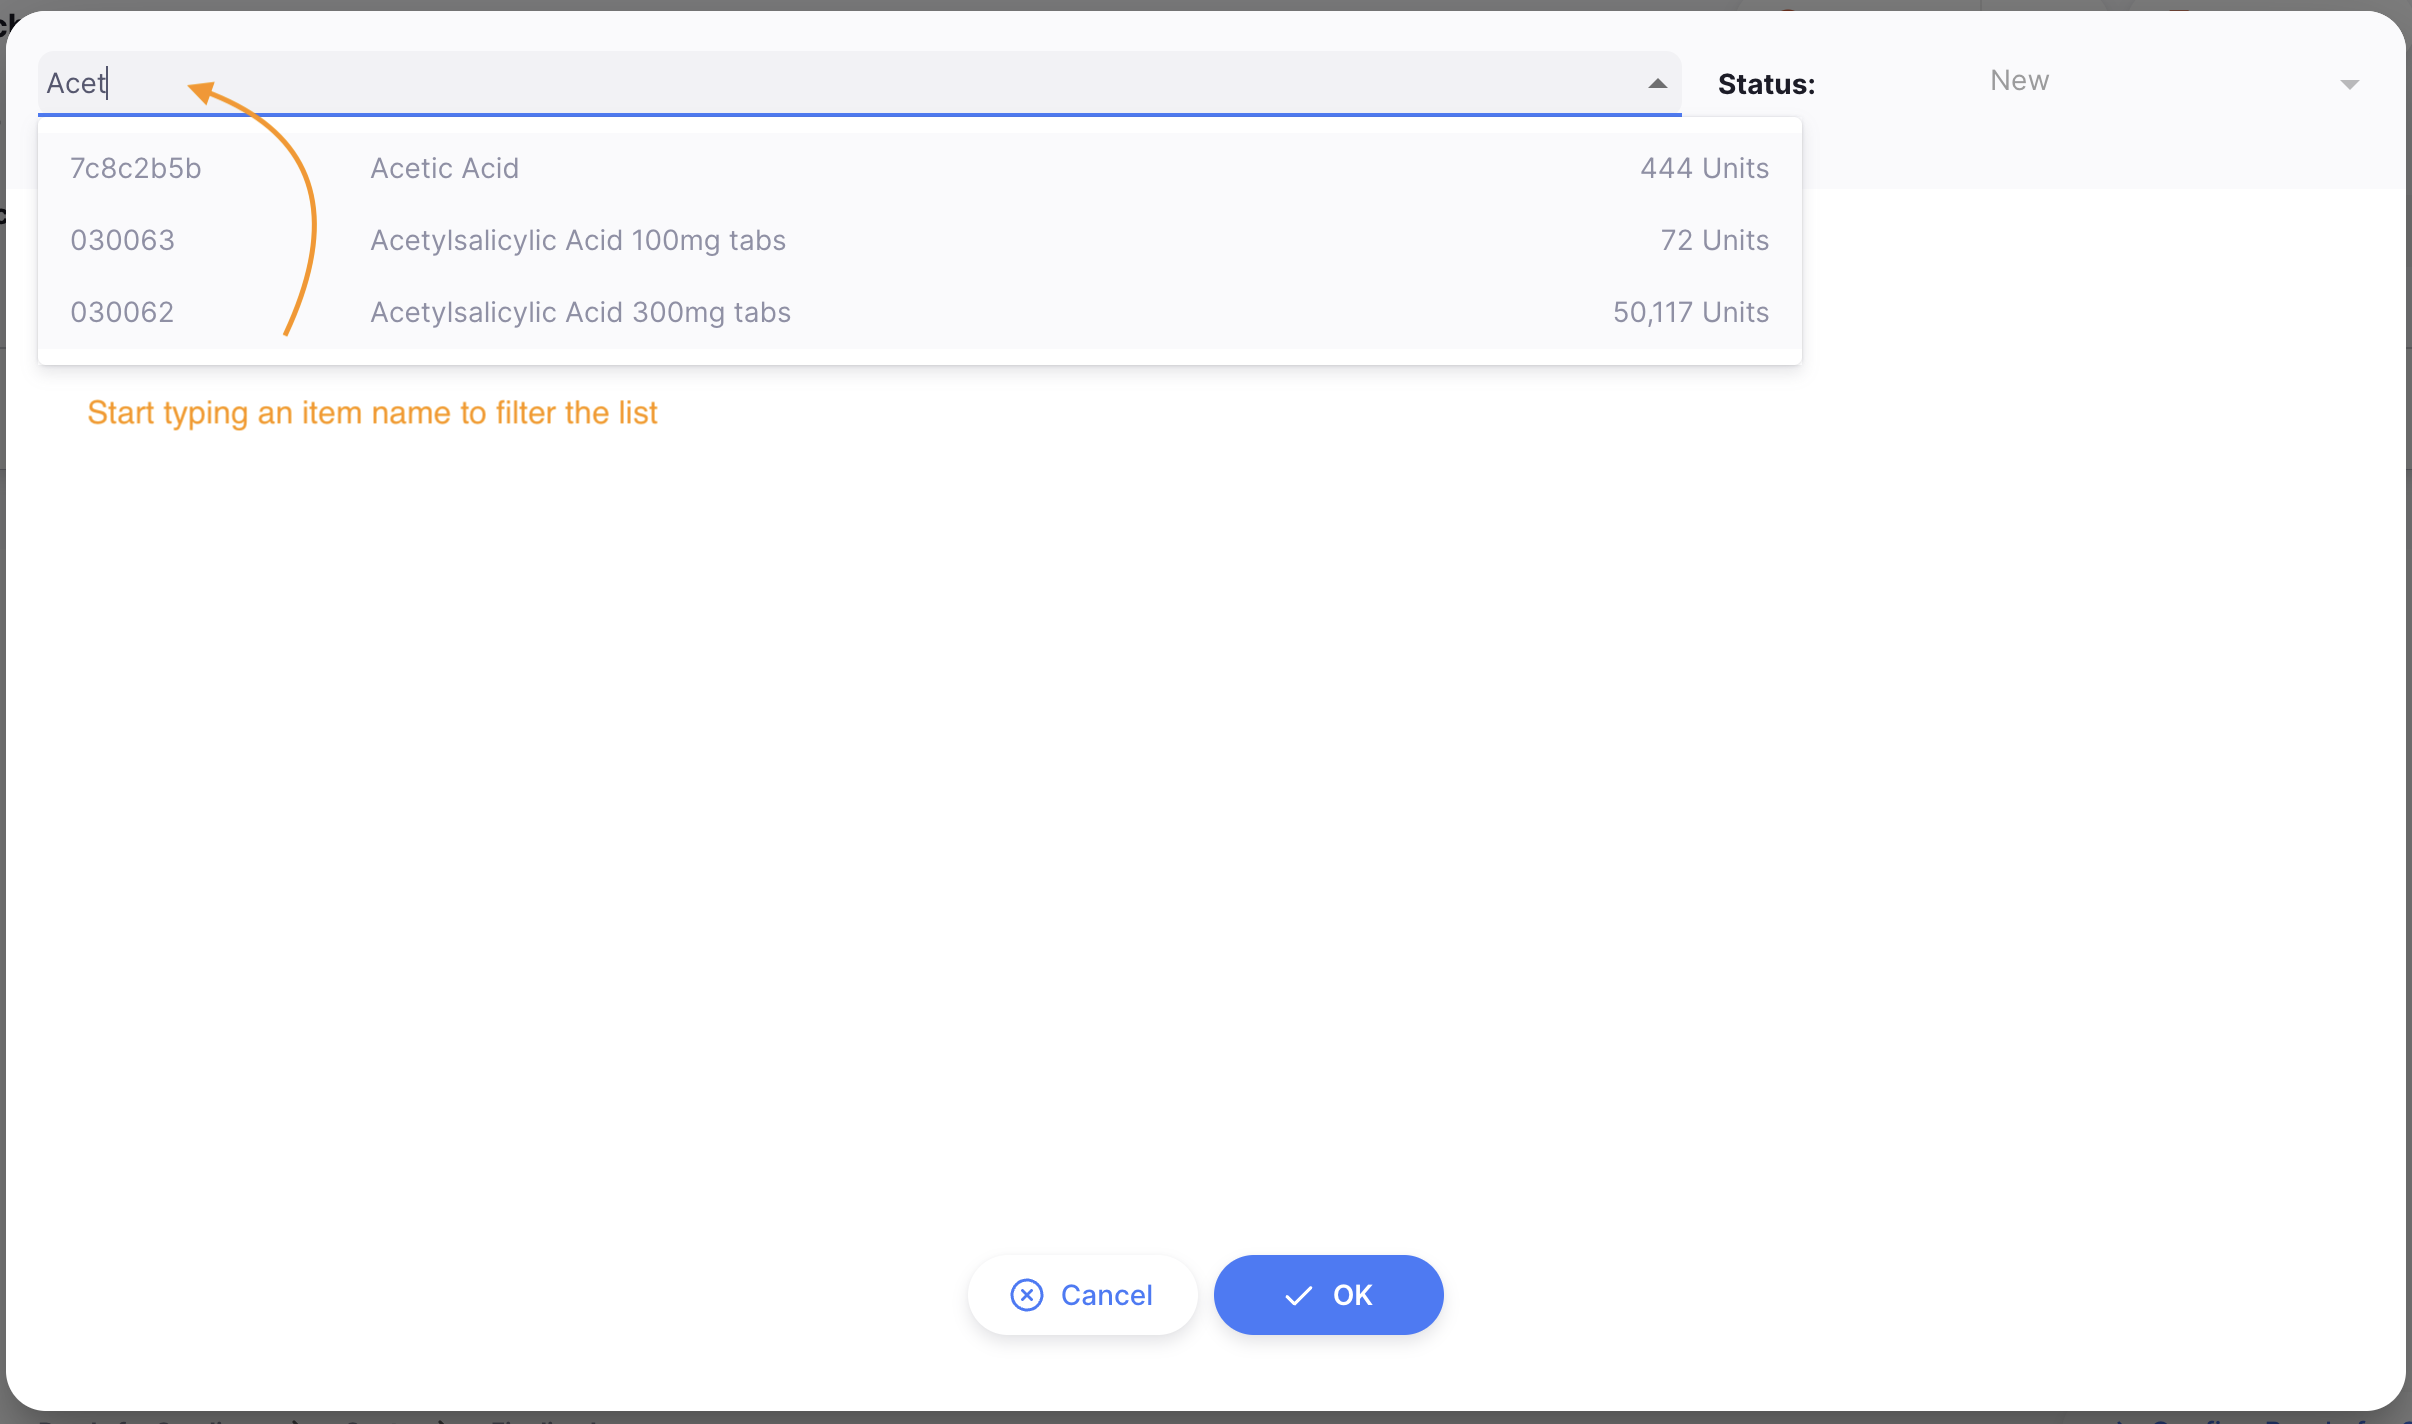
Select an Item🔗
In the Add Item window, you can look up an item by:
- Reading through the list of available items
- or by typing some or all of an item name
- or by typing some or all of an item code
Once your item is highlighted, tap on the name or press Enter.


Item details🔗
There are a number of fields with information about the item. You can update most fields while the purchase order is at New or Ready for Approval status. Some fields are editable at later statuses, or are only for viewing additional information.
| Field | Description |
|---|---|
| Status | The status of this line. Editable only when the purchase order is at Sent status |
| Line number | The line this item is on for this purchase order. |
| Stock on hand | The number of units of this item in your store. |
| Unit | Type here the type of units being ordered, for example 'tablet'. |
| Supplier item code | The item code used by the supplier. Leave blank is not applicable. |
| Manufacturer | Select a manufacturer from the dropdown list. |
| Requested packs | The number of packs you are requesting - only editable at New and Ready for Approval statuses |
| Adjusted packs | If the purchase order is at Ready for Sending or Sent statuses, users with permission are able to edit the adjusted packs field. This will become the new number of packs ordered, but is a separate field from the requested packs. The adjusted packs amount cannot be less than the amount already received for this item on the purchase order. |
| Pack Size | The number of units per pack (by default, pack size is 1). |
| Requested | A read-only field with of the number of packs requested. |
| Adjusted packs | A read-only field with the adjusted packs for the order. |
| Price per pack (before discount) | The base price per pack in the selected currency. |
| Discount percentage | The discount amount that applies to this item. |
| Price per pack (after discount) | The discounted price per pack in the selected currency. |
| Total cost | Read-only field with the calculated cost of all packs for this item, after any item discount is applied. |
| Requested delivery date | Requested delivery date for this item. It can be different to the requested delivery date for the purchase order. |
| Expected delivery date | Expected delivery date for this item. |
| Comment | Free text field for a comment regarding this item. |
| Notes | Free text field for including notes about this item. |
Sent status and the Adjusted packs are edited for an item, the purchase order status will change to
Ready for sending and the line status will change to New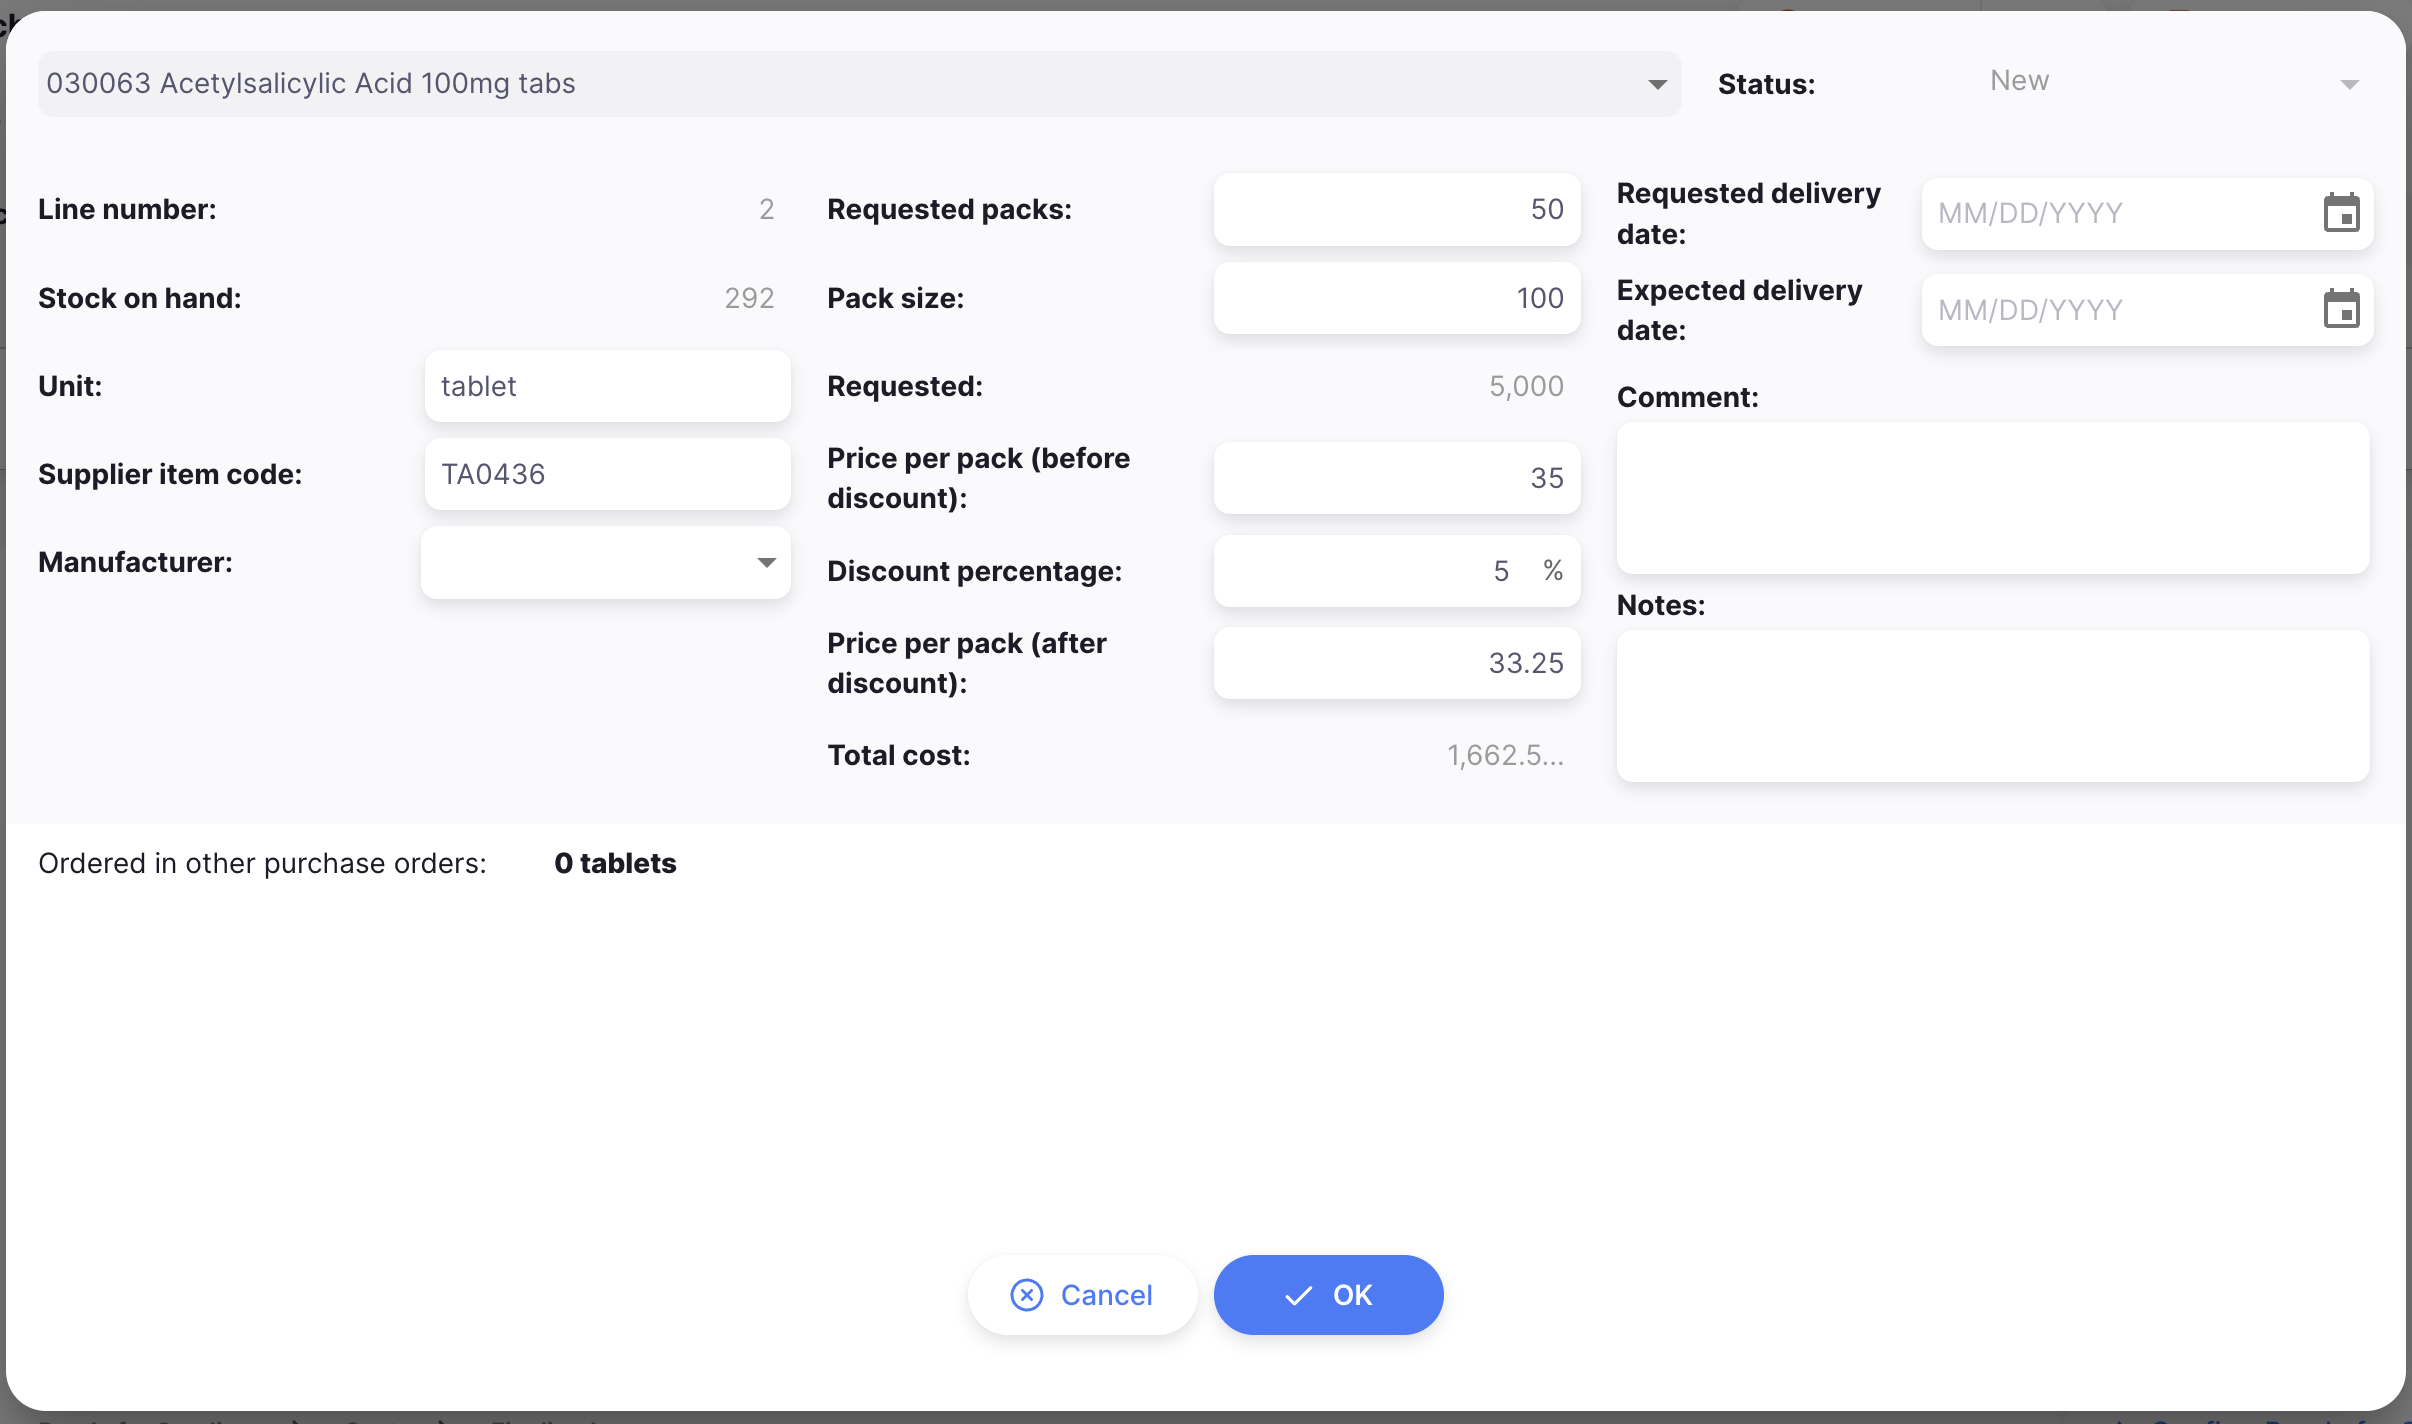
Confirm item and quantities🔗
When you're done, you can add the new line by tapping on:
OKif you don't want to add another line to your purchase orderOK & Nextif you have other lines to create
Otherwise, you can tap on Cancel and your changes won't be saved.
Adding lines to a Purchase Order using a Master List🔗
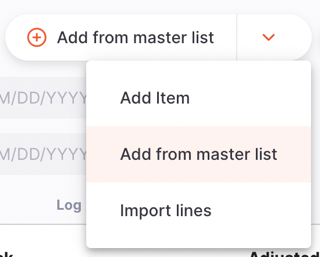
Tap on the Add from master list button from the Add button selection.
A new Master Lists window opens. This allows you to select the required master list. Simply click on one of the lists (if you have some available).

Click OK on the prompt:

You will then have placeholder lines added to your purchase order, which will then look like this:
The imported rows will have zero for the number of packs value, and are therefore shown in a blue font with no requested amount or pricing. You can follow the steps for editing these lines, as detailed above.
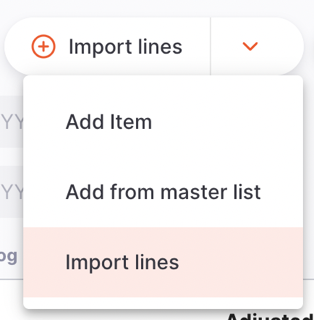
Adding lines to a Purchase Order using an Import🔗
Tap on the Import lines button from the Add button selection.
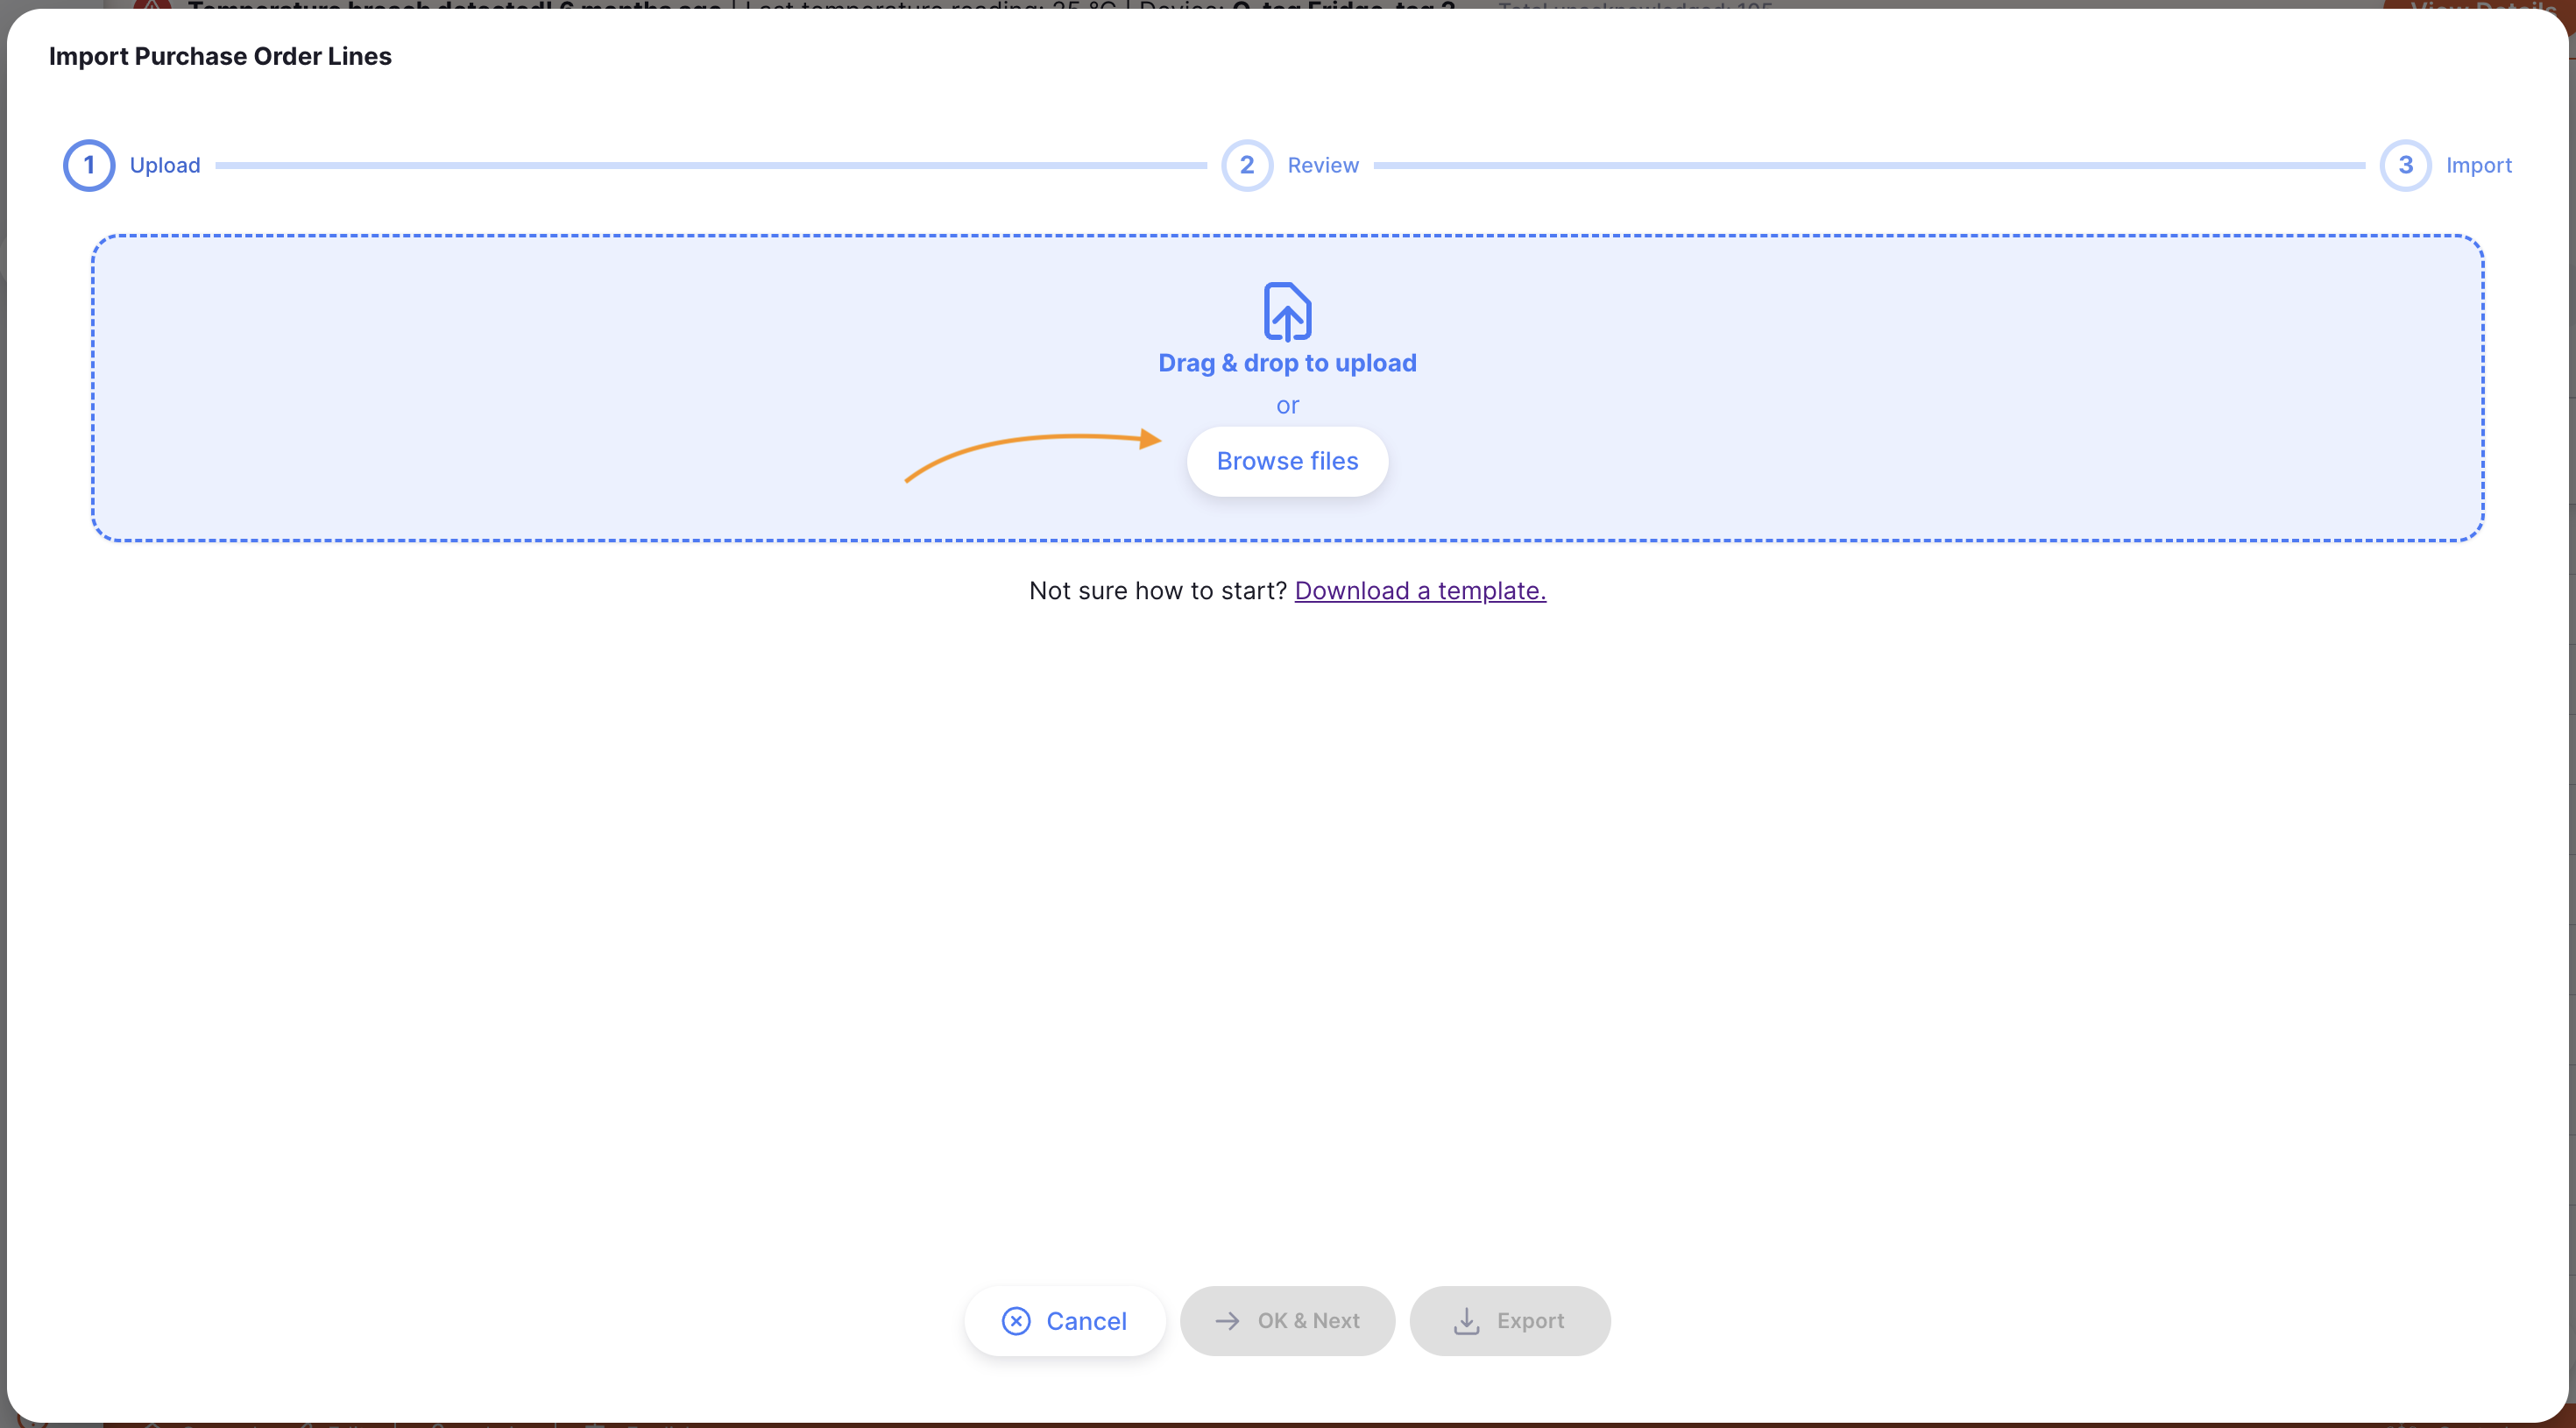
This will open an import modal. Click on Download a template to download a csv
template which can be used to import assets.
Data will need to be converted into the format of the csv template provided in order for Open mSupply to be able to process and upload this data.
When you are ready, drag and drop the csv file into the modal or click on the Browse files button to select the file from your computer.

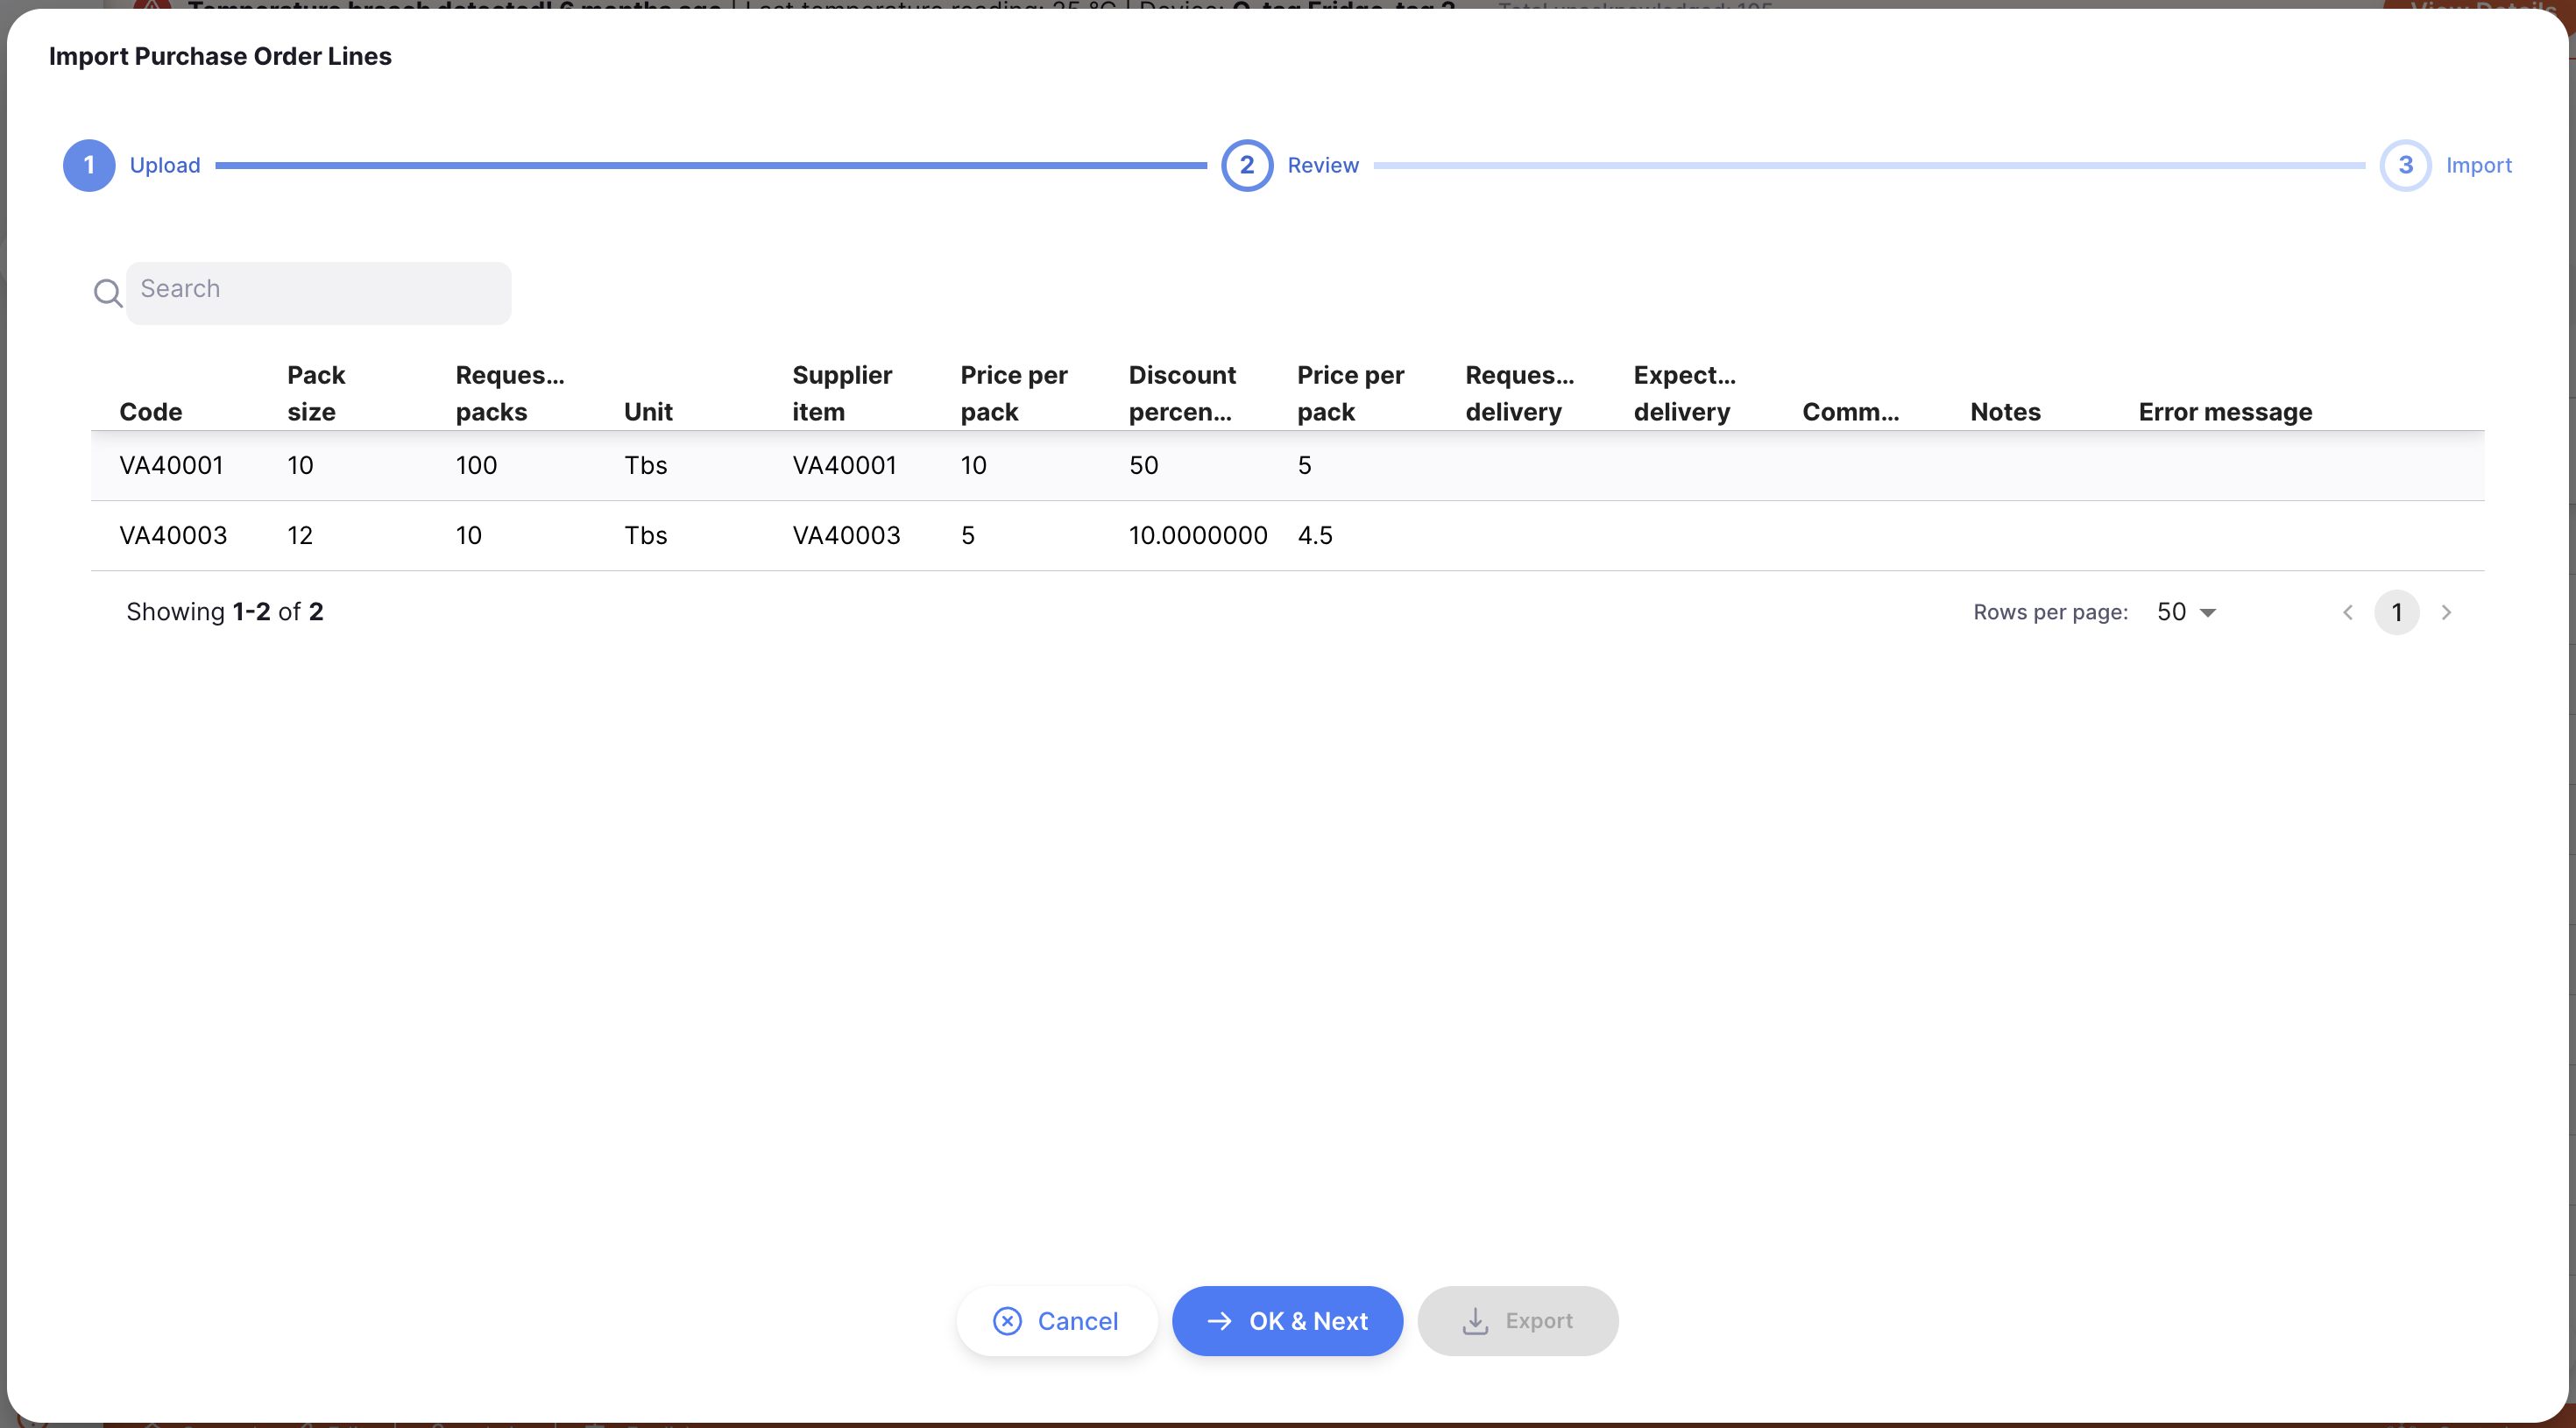
Upload Errors🔗
After uploading your CSV file, your data will be validated and displayed to you to review. At this step, if the data in your uploaded file is not valid, you will see an error message and won't be able to continue to the import step.
Common mistakes here are uploading a file type other than CSV, or if a price value or calculation results in an invalid number. You'll see these errors in the Error message column.
You can use the Export button at the bottom of the upload window to download a CSV file which includes the error messages, to investigate what went wrong.
Once you have corrected the errors, you can go back to the Upload tab to upload the corrected file.
Editing a Purchase Order line🔗
To edit a Purchase Order line, simply tap on it. An identical window to Add Item appears.
New or Ready for approval statuses. At later statuses different fields are available to edit.
| Field | New or Ready for Approval | Ready for Sending | Sent |
|---|---|---|---|
| Requested packs | ✓ | ||
| Pack size | ✓ | ||
| Pricing per pack and item discount | ✓ | ||
| Unit name | ✓ | ||
| Supplier code | ✓ | ✓ | ✓ |
| Manufacturer | ✓ | ||
| Requested and expected delivery dates | ✓ | ||
| Expected delivery date | ✓ | ✓ | |
| Comment and note | ✓ | ✓ | ✓ |
| Adjusted packs | ✓ | ✓ | |
| Line status | ✓ |
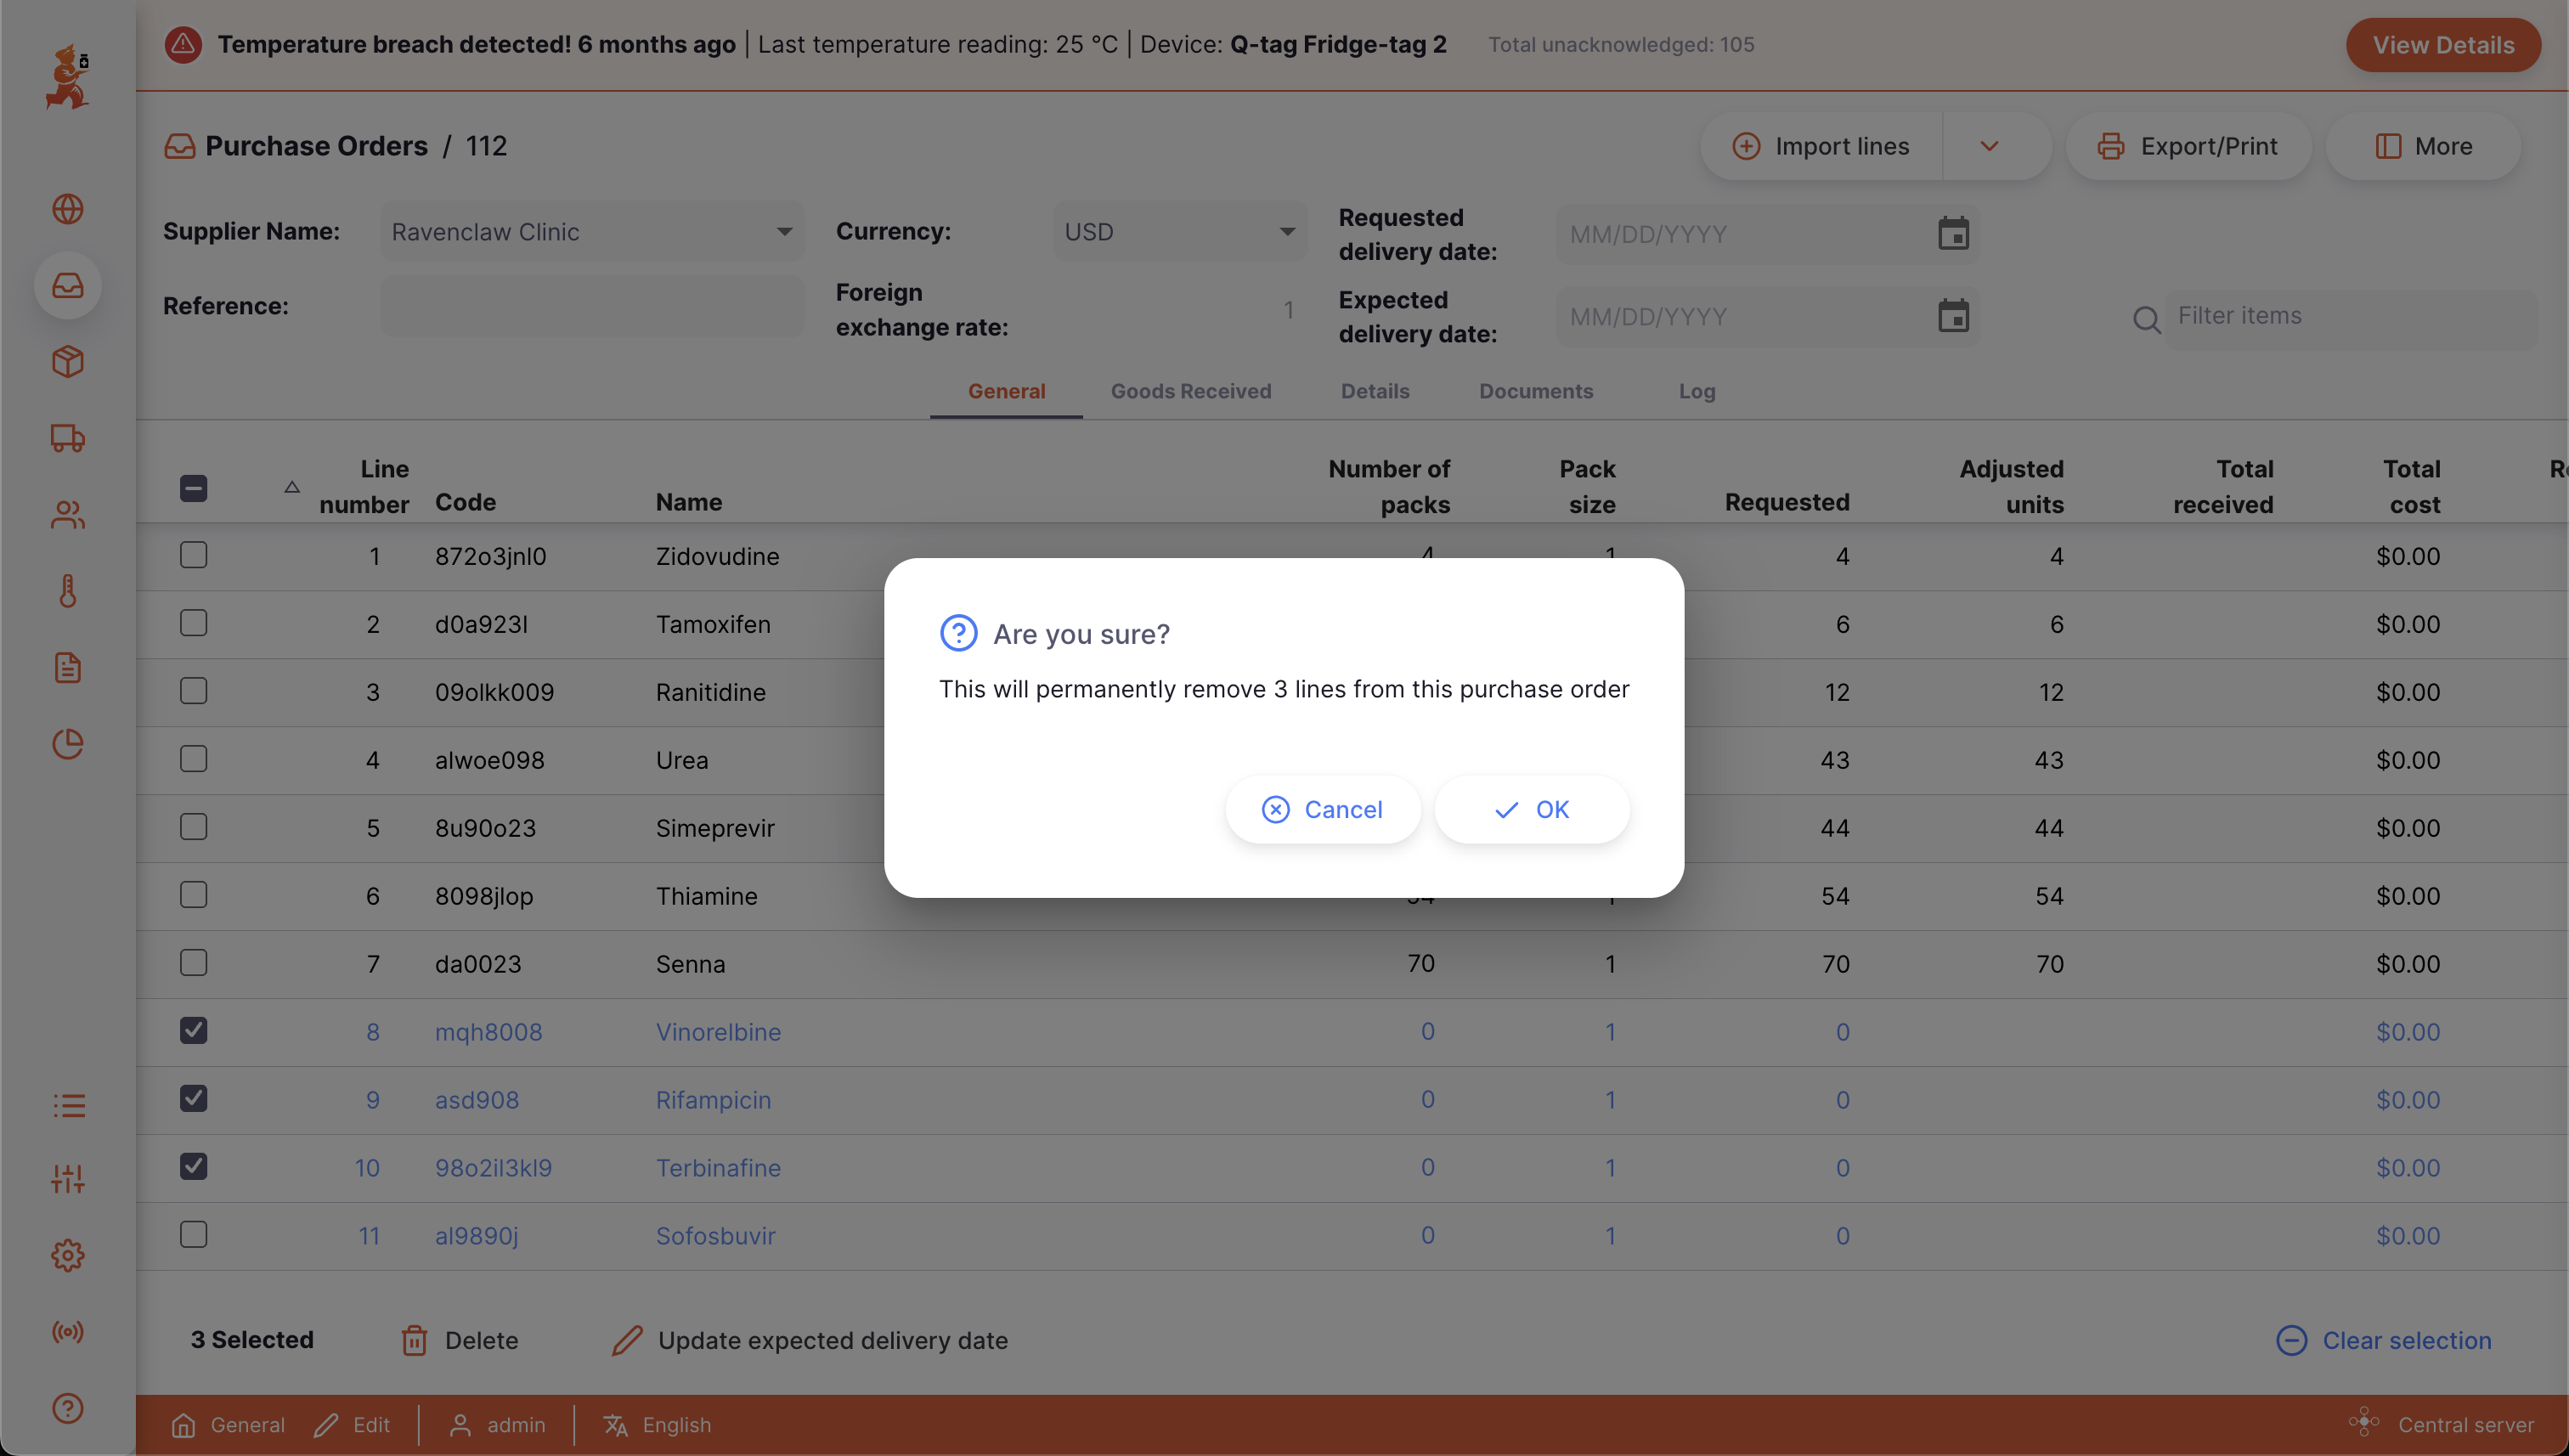
Delete a Purchase Order line🔗
- Open the Purchase Order that you would like to edit
- Make sure that status is not yet
Ready for Sending - Select the line(s) you want to delete by checking the box(es) on the left of the list
- Click the
Deletebutton which appears at the bottom of the page.
Other line actions🔗
If you have selected some lines by checking the box on the left of the list there are several actions which are possible. These affect the selected lines only.
| Action | Effect |
|---|---|
| Delete | As described above, this deletes the selected line(s) |
| Update expected delivery date | Opens a window which allows you to choose an expected delivery date. This will be associated with all the selected lines |
| Closed for receipt | This will set the Line status to Closed on all of the selected lines. This action is only available when the Purchase Order is at Sent status |
| Clear selection | Will clear the selection checkboxes |
Purchase Order Tabs🔗
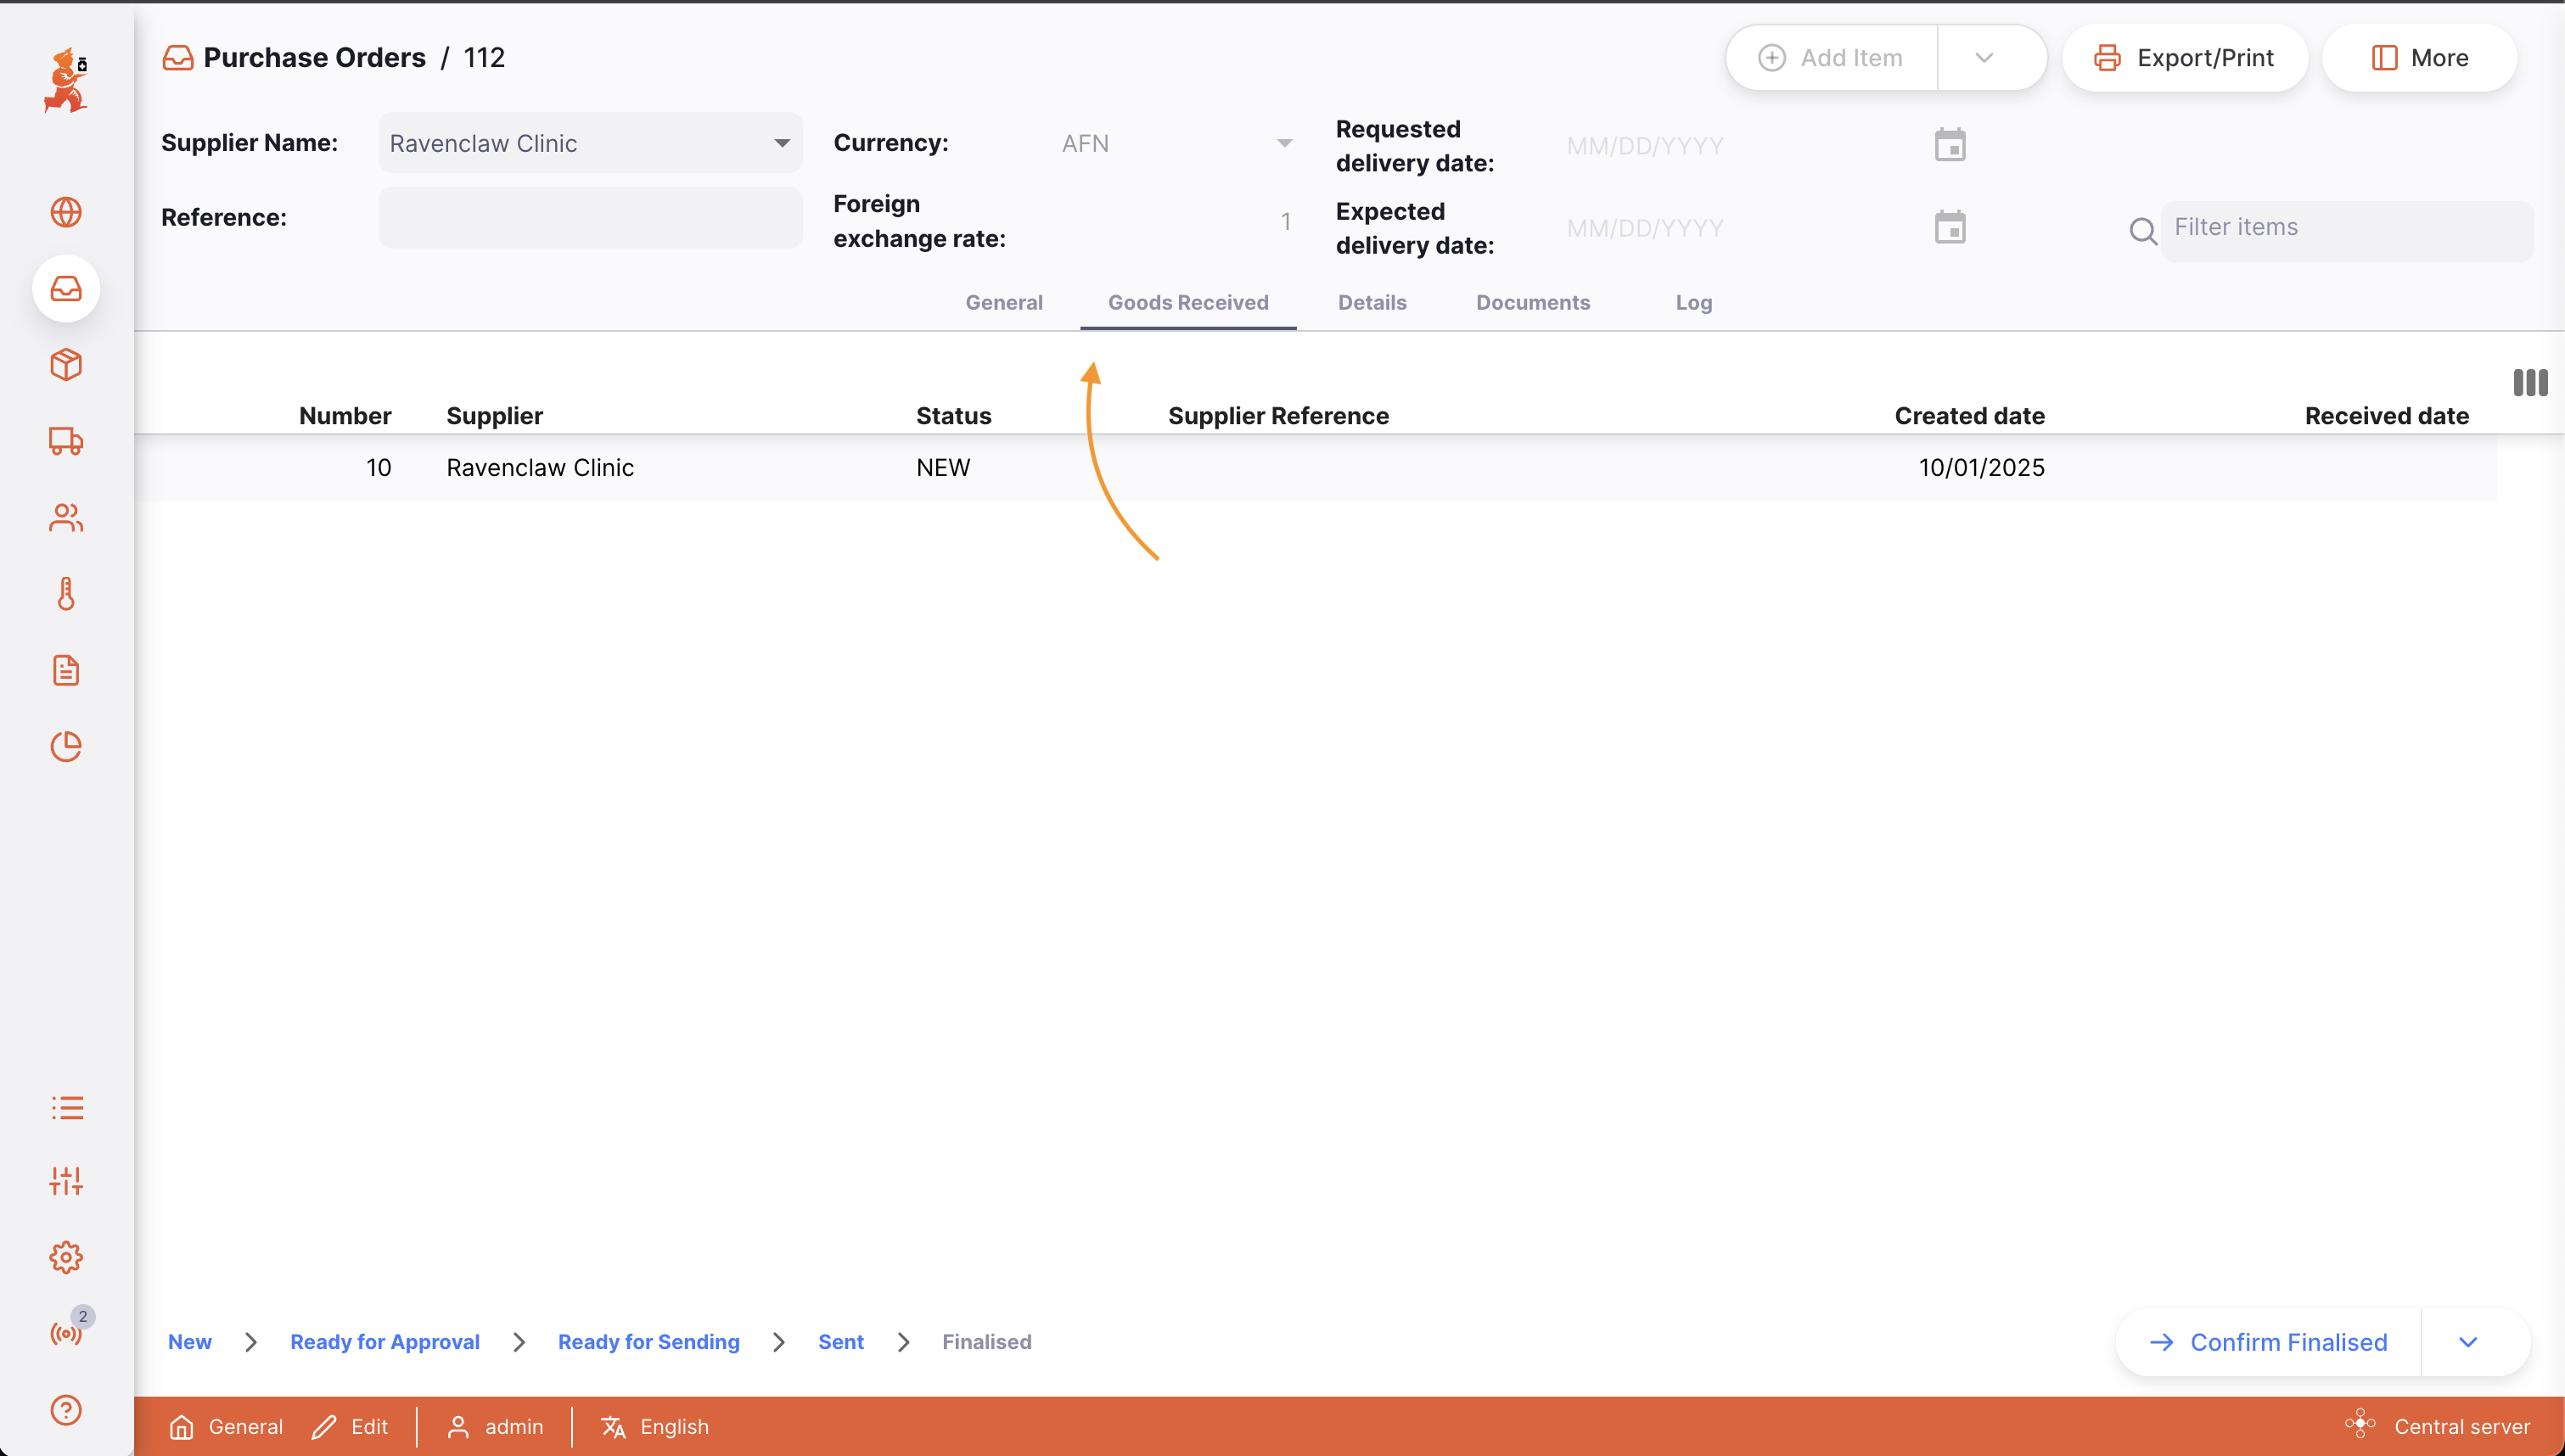
Goods Received🔗
This tab show any Goods Received that are linked to this purchase order. You can tap on the Goods Received line to open it.
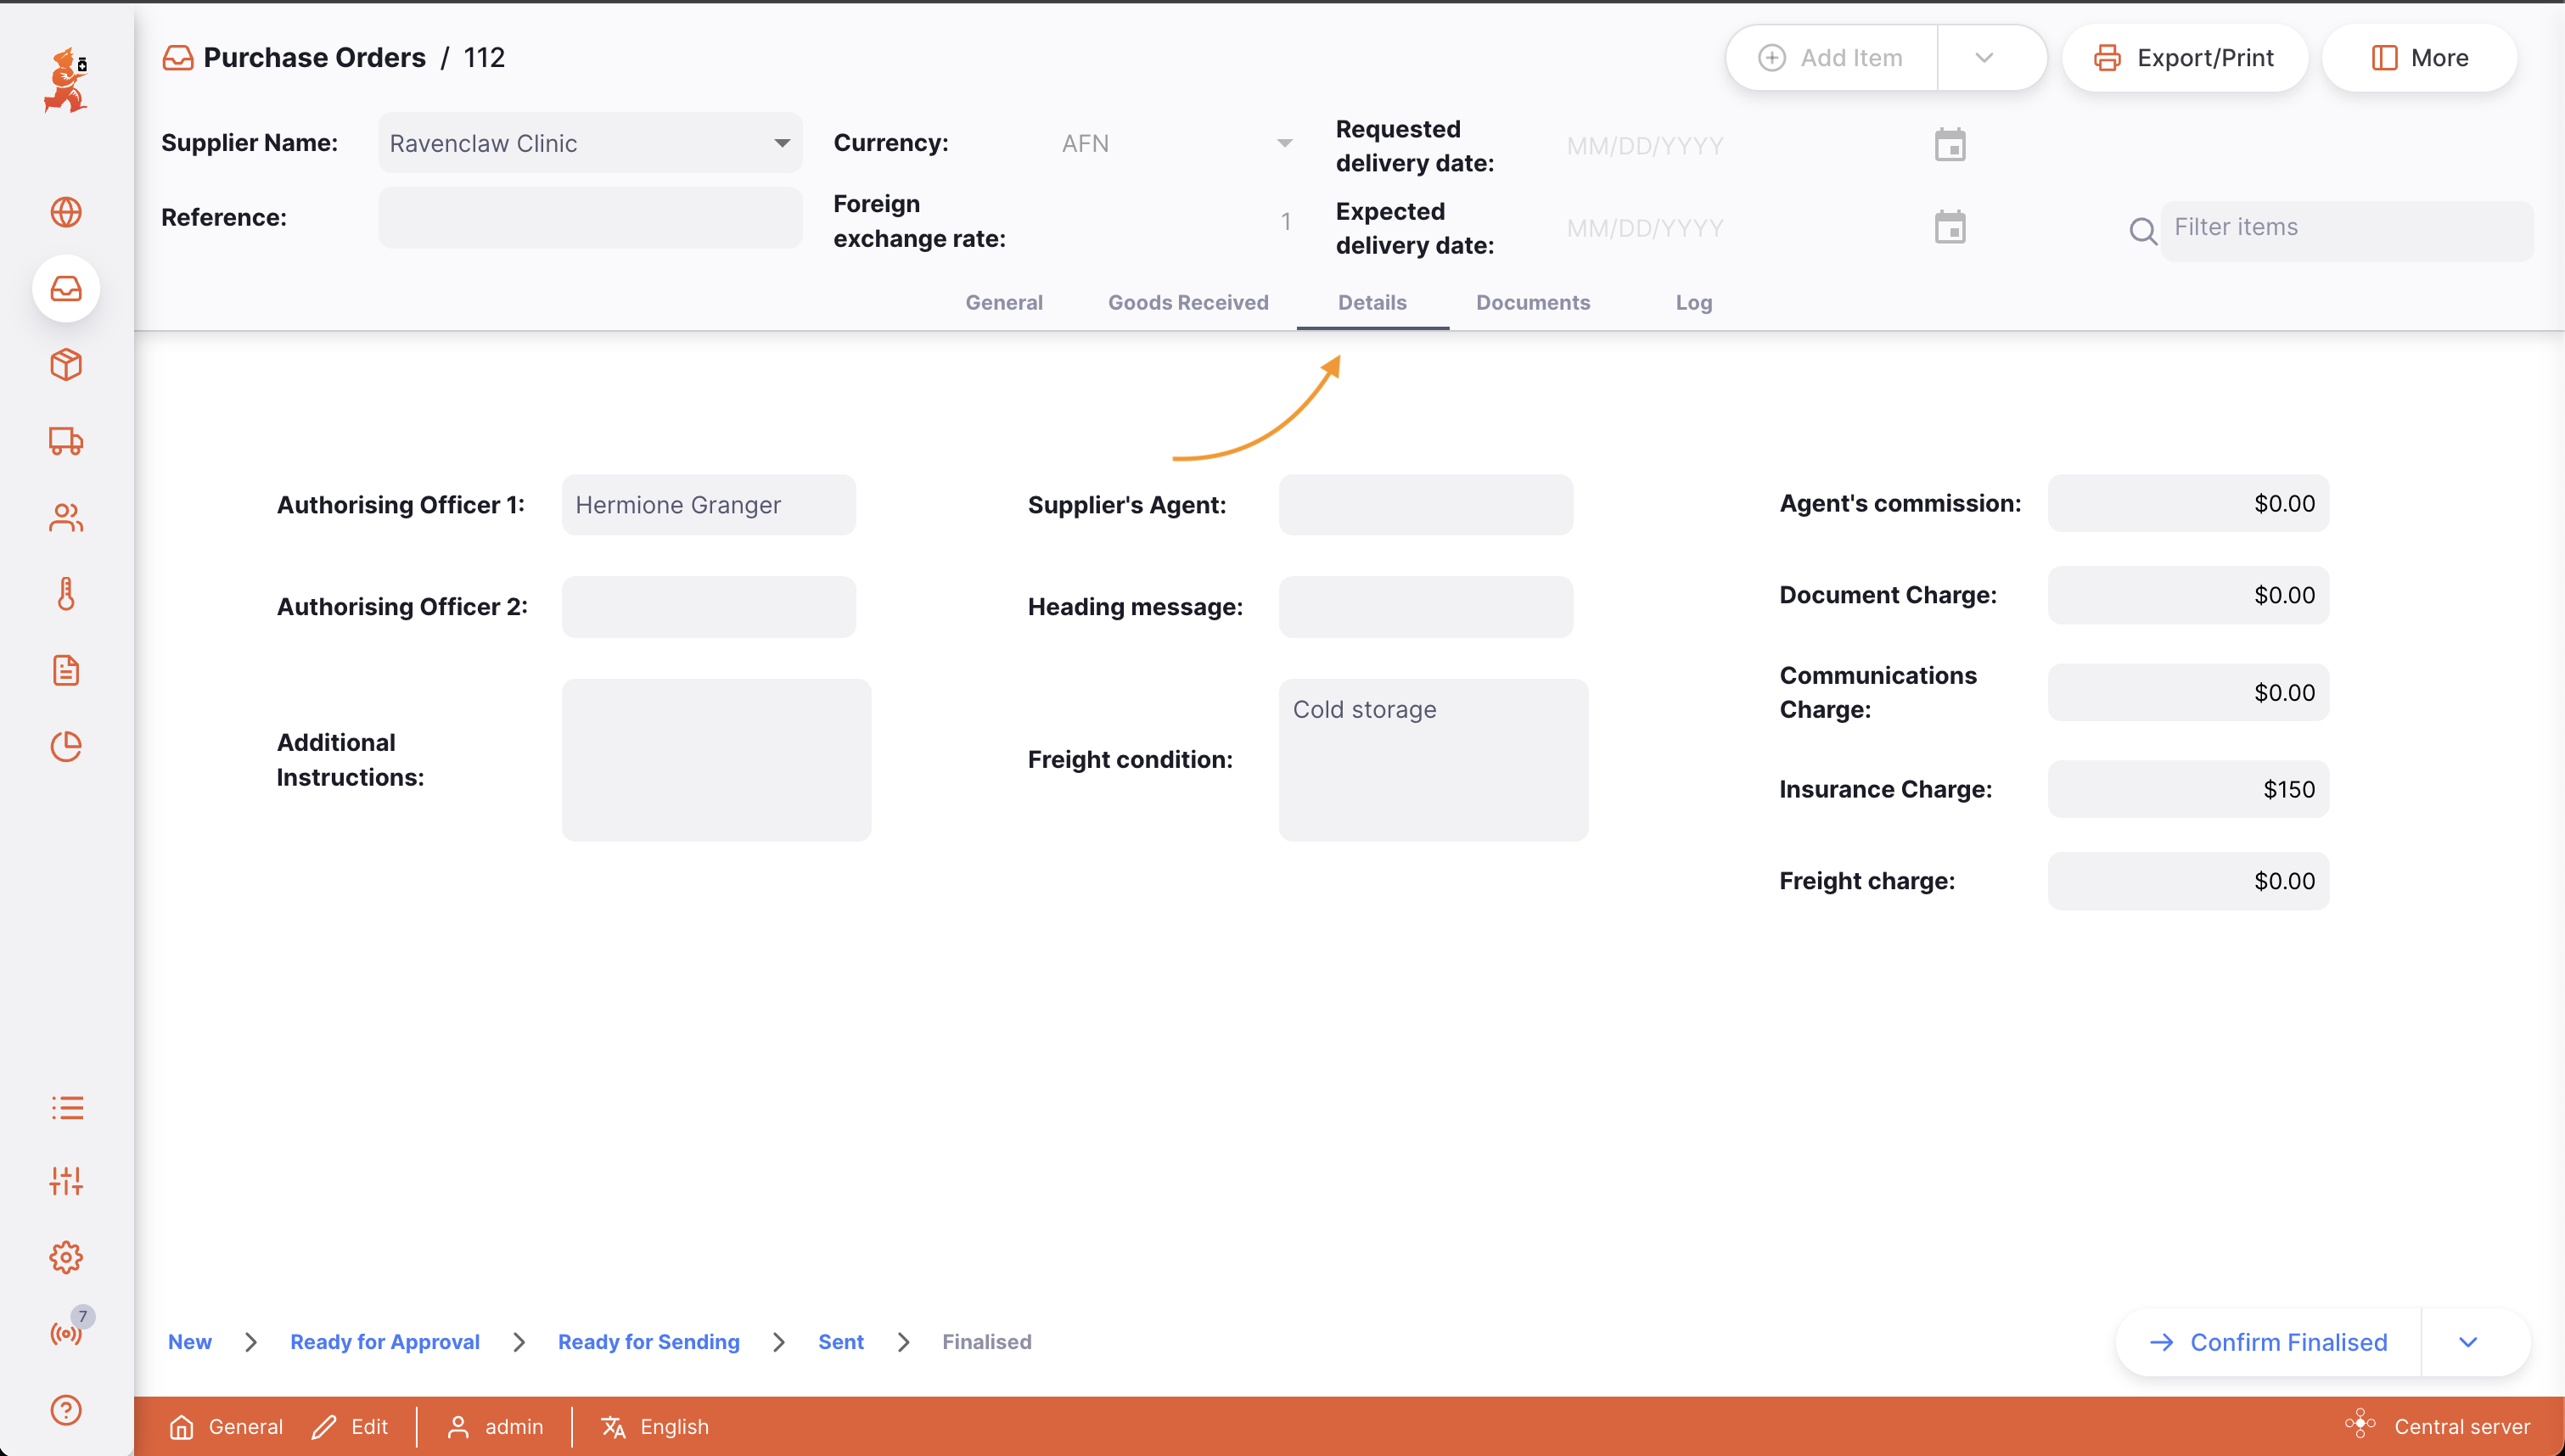
Details🔗
Additional details about the purchase order can be entered here. The following fields are available to edit:
- Authorising officer 1
- Authorising officer 2
- Additional instructions
- Supplier’s agent
- Heading message
- Freight conditions
- Agent’s commission
- Document charge
- Communications charge
- Insurance charge
- Freight charge
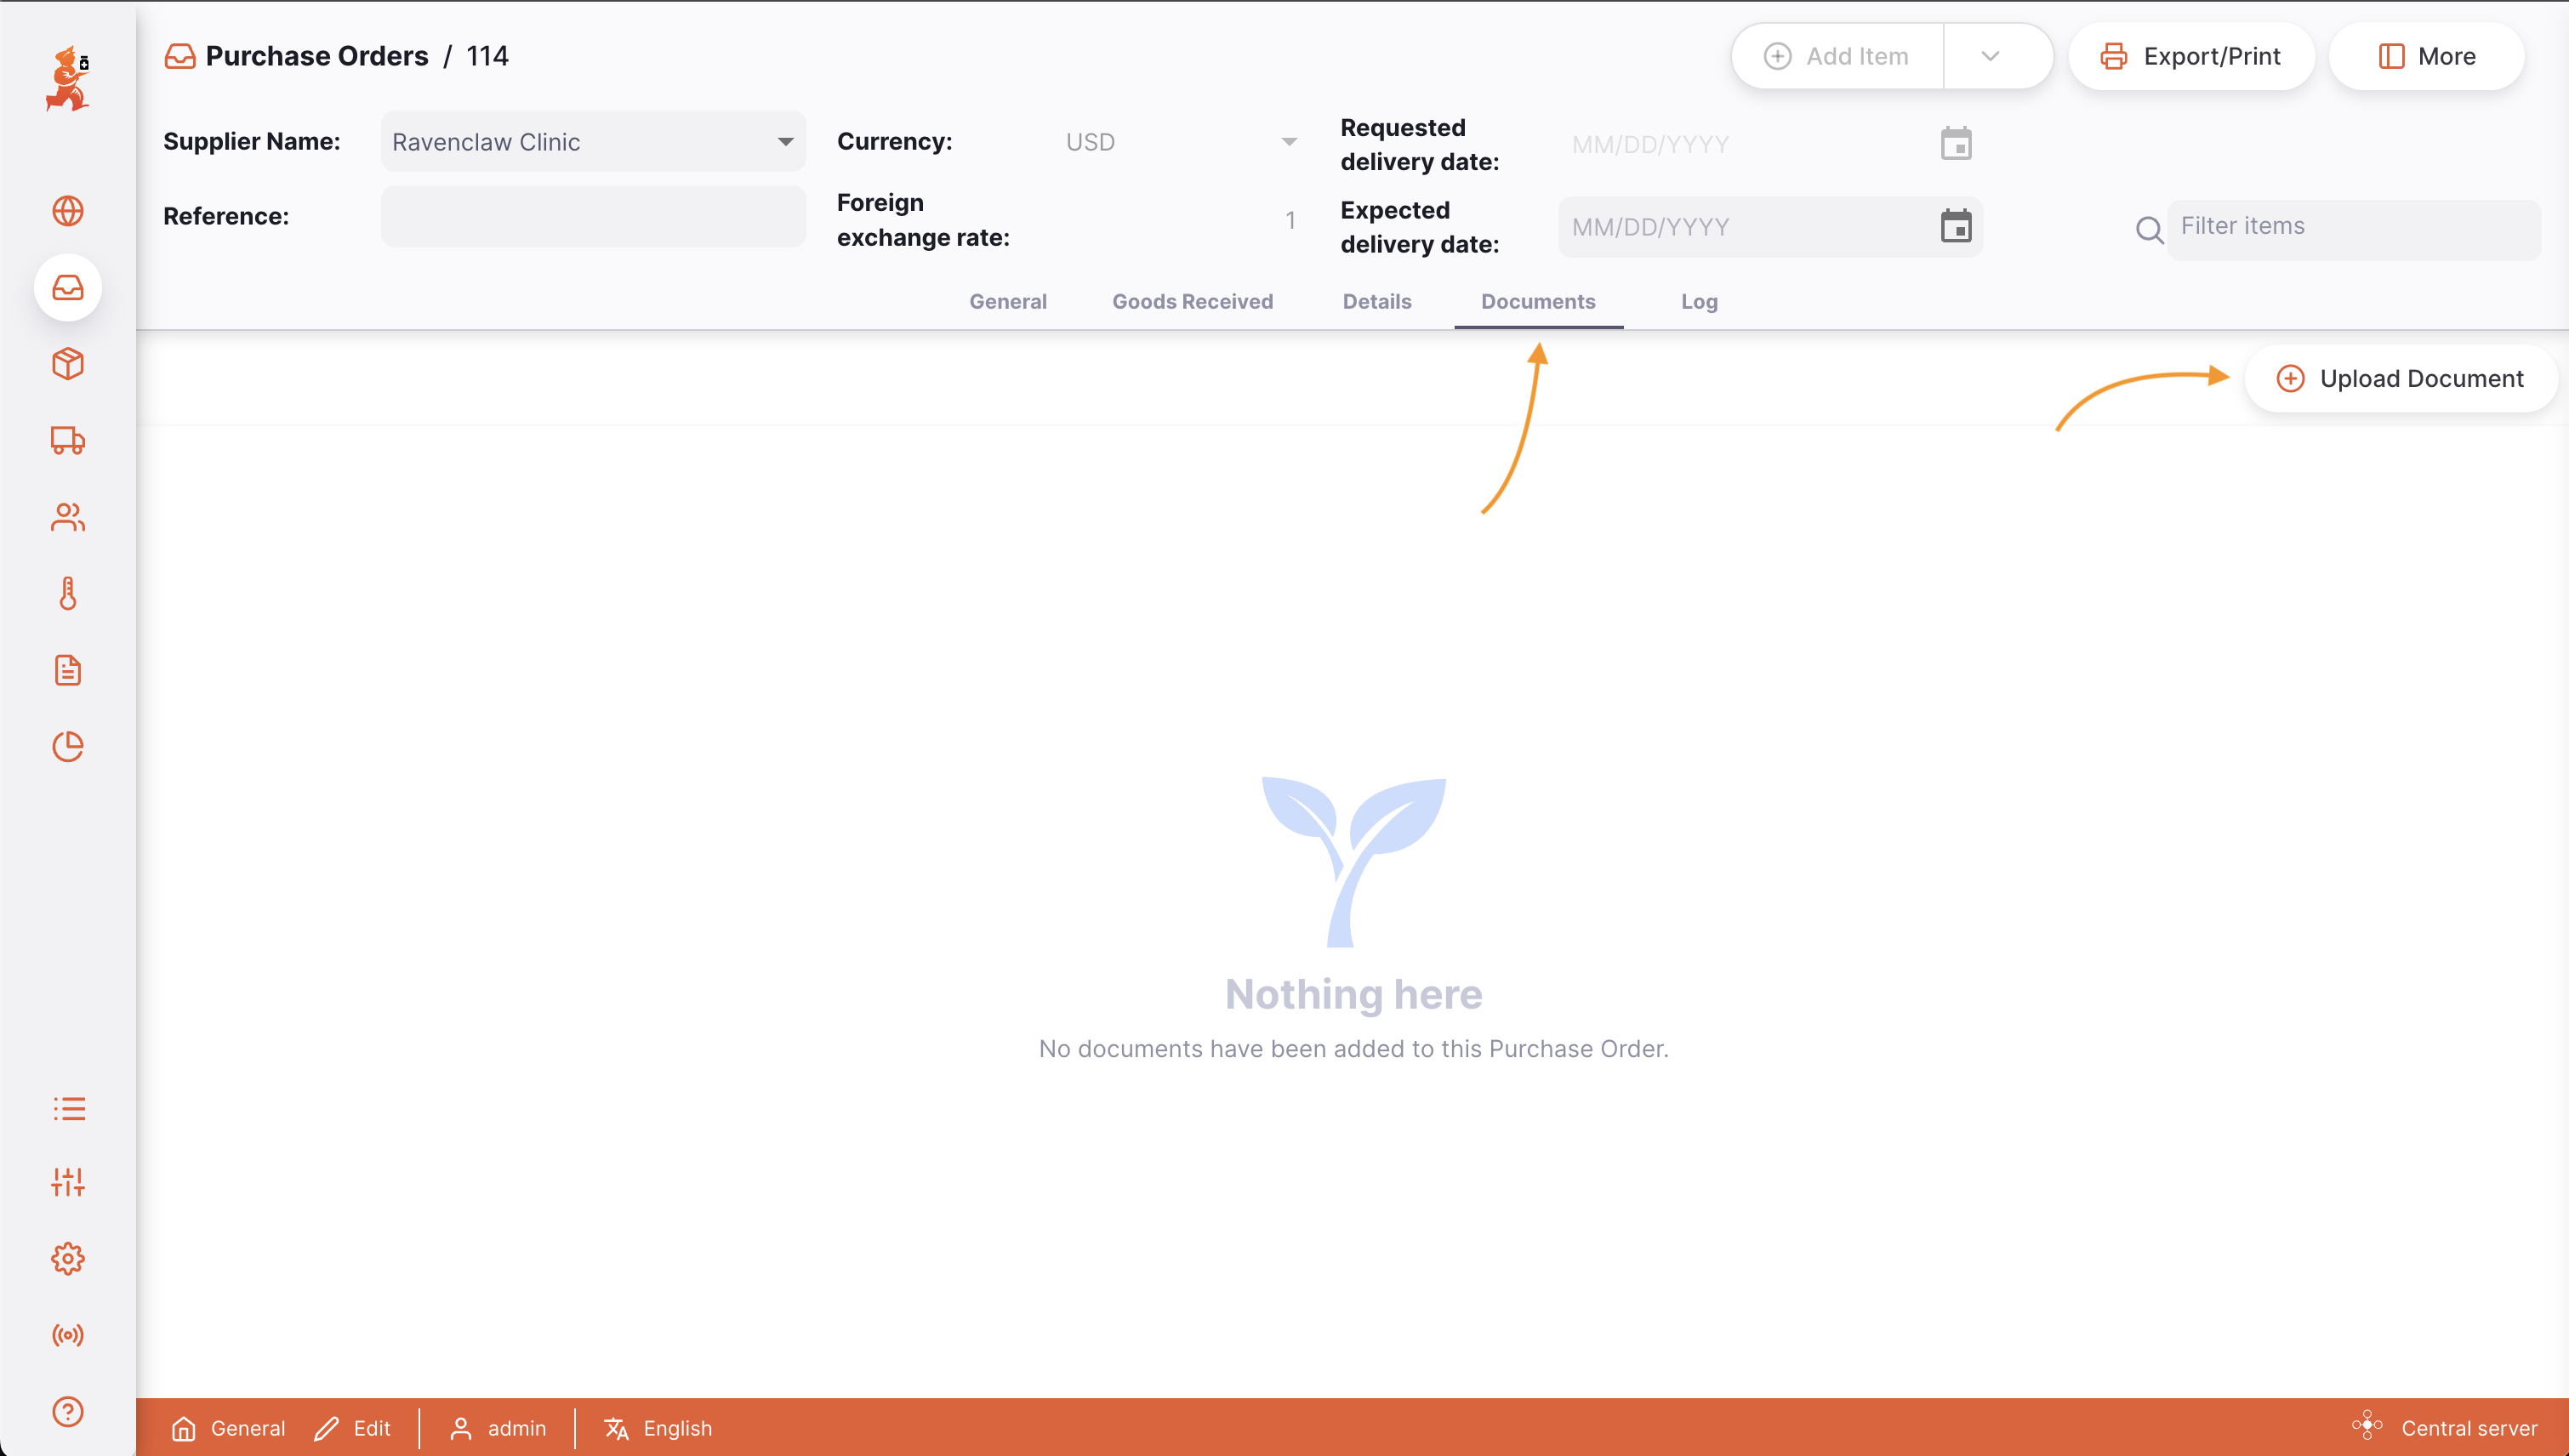
Documents🔗
The Documents tab shows documents which have been uploaded for the purchase order.
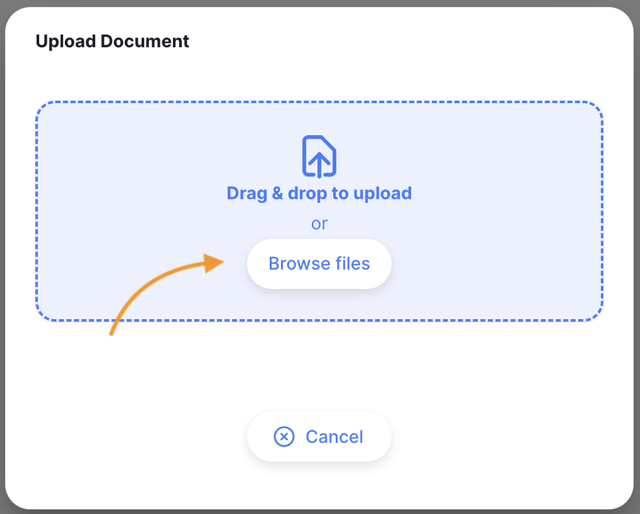
Tap on the Upload document button, you will see an Upload Document modal.
Drag and drop your document into the modal or click on the Browse files button to select the file from your computer.
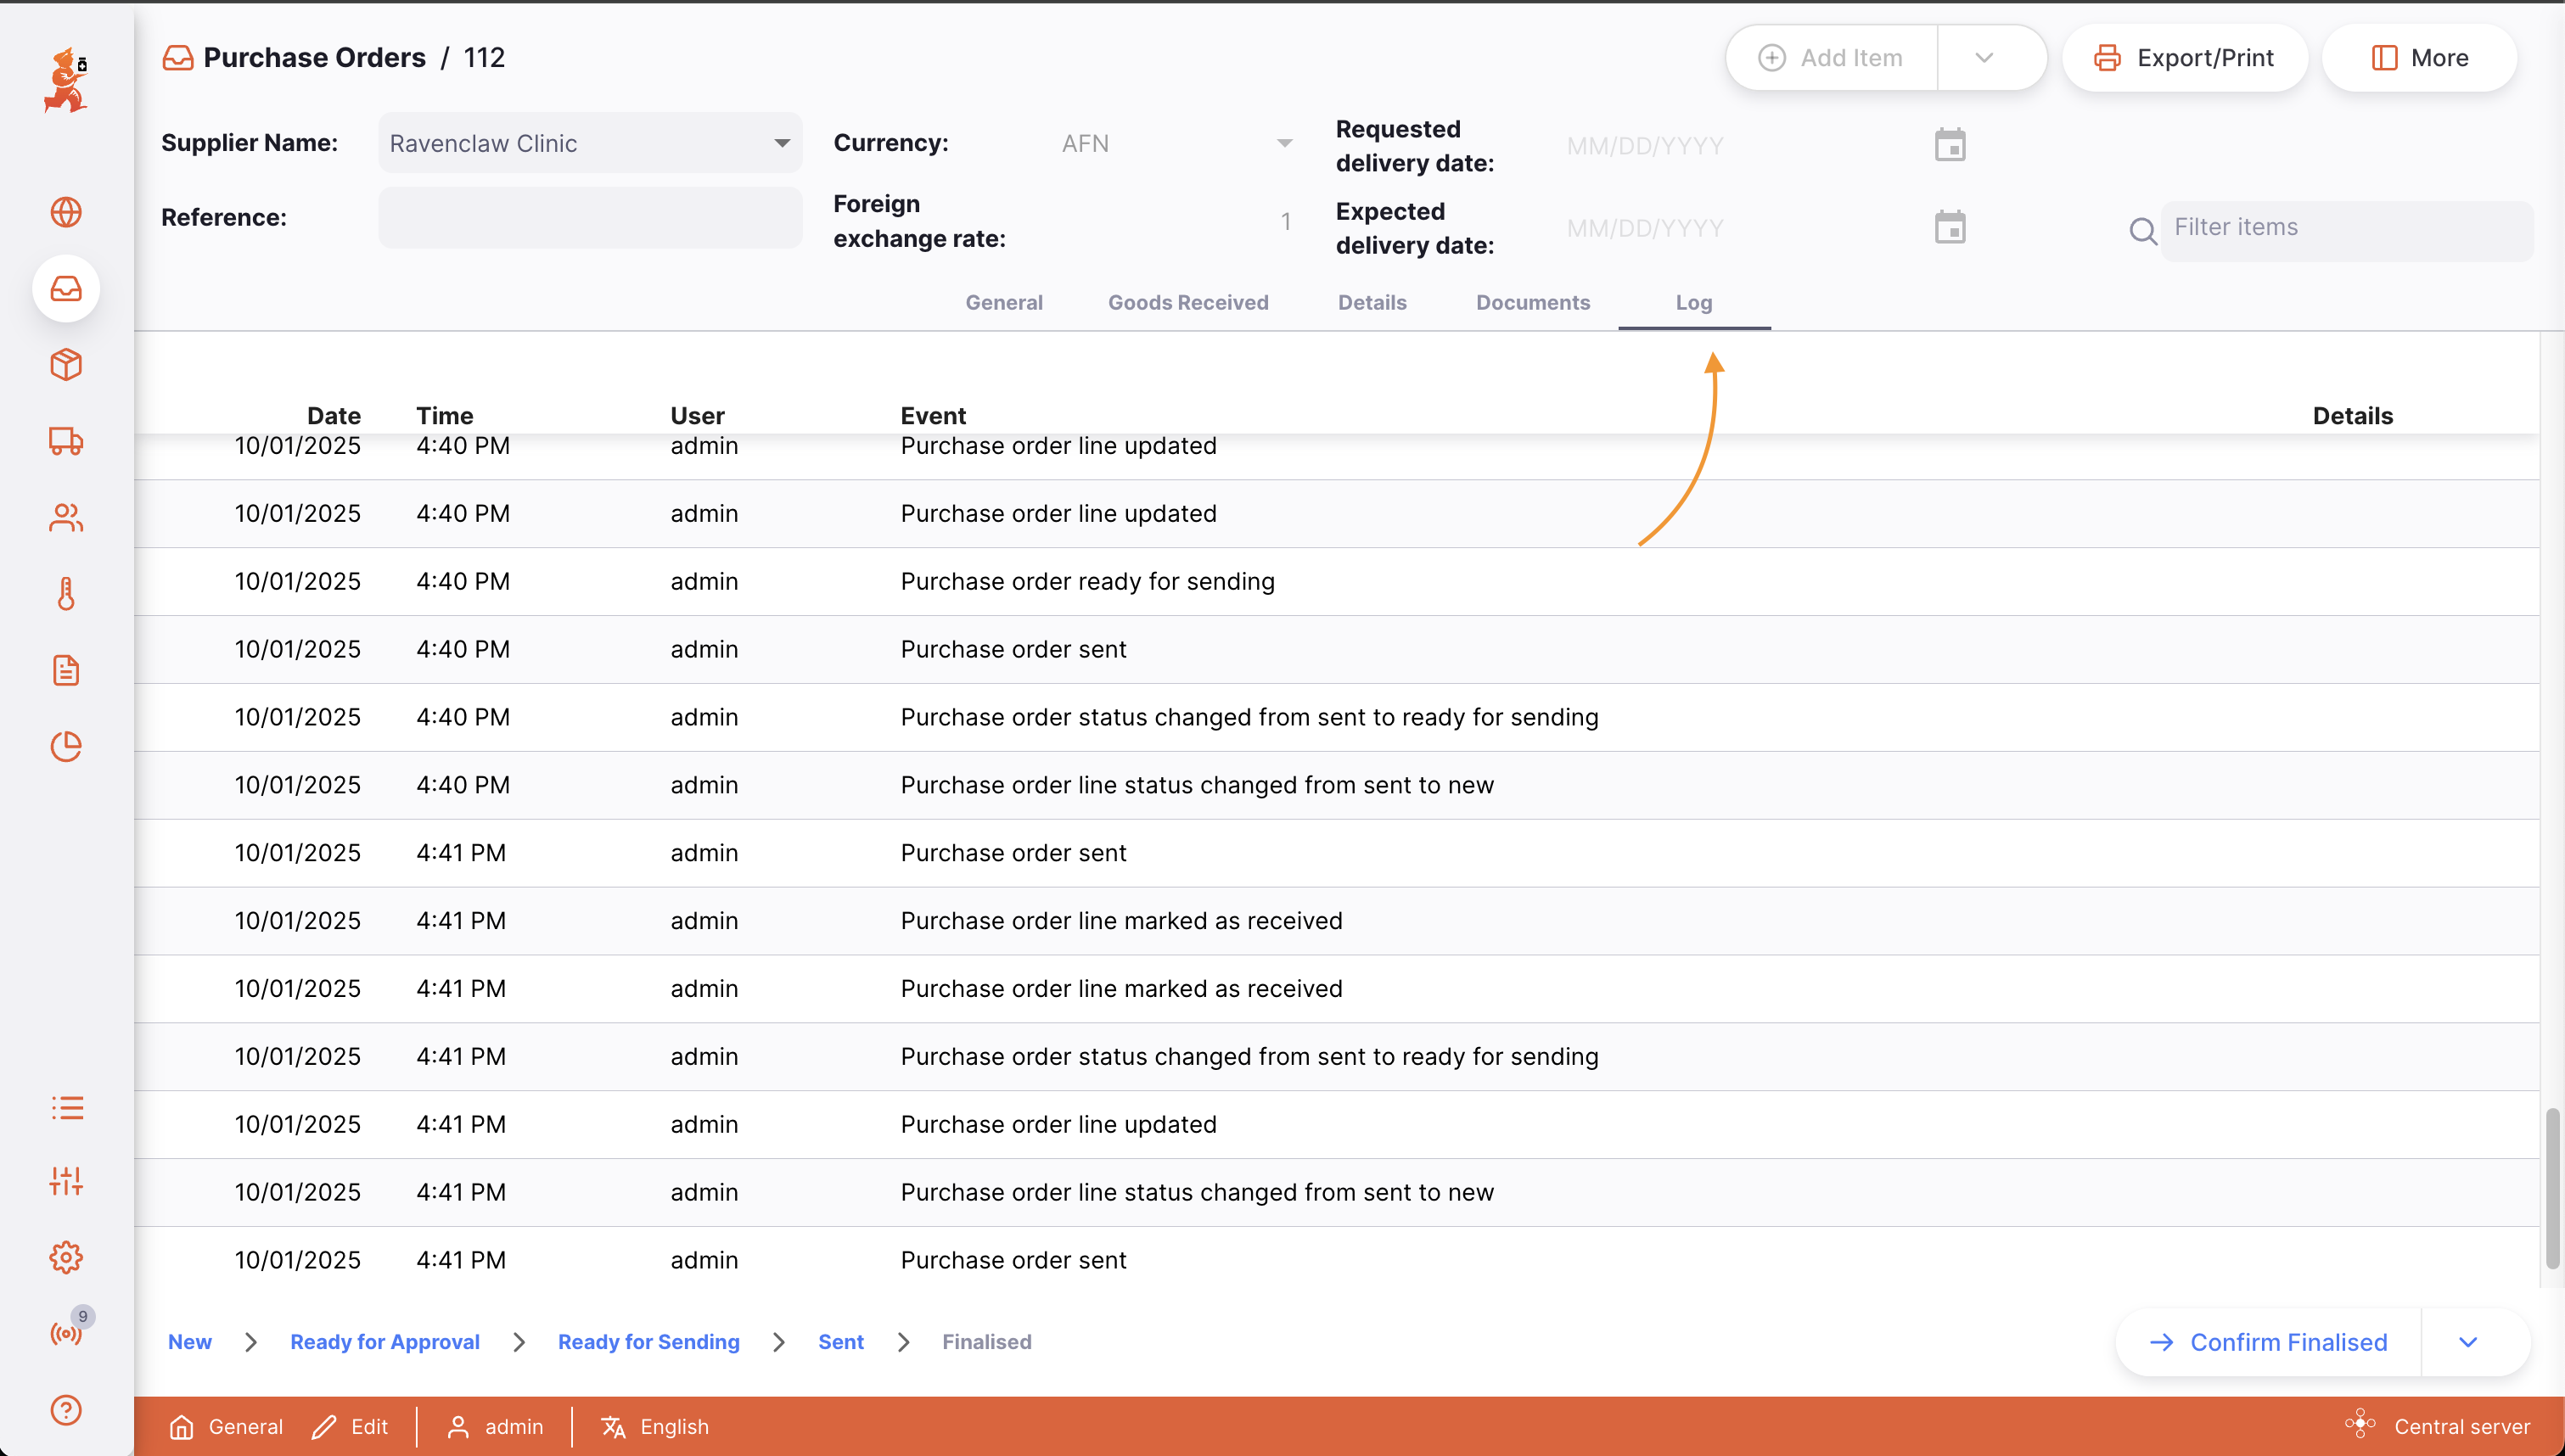
Log🔗
The Log tab shows the activity log of this purchase order.
This records all user actions which have been taken for the purchase order using the Open mSupply system.